Installing and configuring VMware Tanzu Basic Edition on an existing VMware vSphere solution
Nov 26, 2020 · CommentsVMware
Introduction
VMware Tanzu is VMware’s Kubernetes solution, in this guide I’ll show the setup of the Basic edition on vSphere. If you want more background on VMware Tanzu, you can read more about it here.
The infrastructure setup I use for this guide is my own home lab, which will mean it does not necessarily have the complex setup that is in use in the enterprise world, but at least it is not a recently newly deployed rig, but one that has been previously upgraded all the way from version 5.5, and should at least be a little realistic in that aspect as I believe most VMware solutions out there would have an similar history.
Information about my home lab:
| Element | Name | Version |
|---|---|---|
| Physical server | HPe Proliant | DL380 g7 |
| VMware ESXi | VMware ESXi | 7.0.1, 16850804 |
| VMware vCenter | VMware vCenter Server Appliance | 7.0.1, 17005016 |
| Firewall | pfSense | 2.4.5-RELEASE-p1 |
| Storage | NFS | N/A |
Prerequirements
There is some requirements for this setup which is practical to be aware of from the get go. Firstly the setup requires some external solution that loadbalances the Supervisor Controllers of the Tanzu Kubernetes solution, and is also used for loadbalancer type of services in Kubernetes.
The choices you have currently is either NSX-T or HAproxy with the dataplane api. The possibility to set up Tanzu Basic Edition requires version 7.0.0 of vSphere, which gives you NSX-T, and to also have the option of HAproxy you need version 7.0.1. For my setup I currently do not have NSX-T set up, so I will here use the HAproxy setup.
HAproxy setup will also give you a choice between a 2-leg setup, and a 3-leg setup. Doing this without NSX-T removes some use of functionality tho, like i.e. PodVM, so choose what meets your needs.
Networks
One of the imporant things if of course the network setup. Based on my own experience installing this I can say that the names of different subnets and ip ranges can sometimes be a little confusing, as at least the naming between the options in HAproxy, and the Workload Management GUI where you install Tanzu does not always conform and match. If you need more clarification and information about the network, I found this blogpost informative.
I’ve chosen to do a 3-leg HAproxy in my setup, which means I need to have 3 networks defined for my distributed switch, namely “Management”, “Workload”, and “Frontend”. These networks mostly speeks for themself, “Management” is of course for management resources, “Workload” is for where K8S workloads will run, and “Frontend” is the frontend on HAproxy where services will be exposed. If you choose a 2-leg setup, the guide will mostly be the same, but you can ignore the parts about “Frontend”.
As can be seen later in the guide my setup is:
| Network | Label |
|---|---|
| Management | Management |
| Workload | DPortGroup-K8S-206 |
| Frontend | DPortGroup-DMZ-204 |
You would also need to allocate some IP ranges and/or subnet for use in the solution. This is always good to have an idea of what you will use before starting the installation.
| What | Network | IP ranges or subnet | Extended description |
|---|---|---|---|
| Management subnet | Management | 192.168.100.0/24 | |
| HA proxy IP | Management | 192.168.100.19 | |
| Management IPs for Supervisor Controllers | Management | 192.168.100.180-192.168.100.184 | Needs to be a range with 5 IP addresses |
| Internal Service IPs | N/A | 10.96.0.0/24 | This is used for internal services, and just need to not crash with anything else used |
| Workload subnet | Workload | 10.0.8.0/24 | |
| HA proxy IP | Workload | 10.0.8.2 | |
| Workload IPs | Workload | 10.0.8.100-10.0.8.200 | IPs that can be allocated to K8S workloads |
| Frontend subnet | Frontend | 10.100.1.0/24 | |
| HA proxy IP | Frontend | 10.100.1.1 | |
| Frontend IPs | Frontend | 10.100.1.177-10.100.1.190 or 10.100.1.176/28 | IPs that can be allocated to K8S workloads |
I have also setup all these networks on my pfSense, so .1 in all networks is the gateway, and also the DNS address. That is some additional resources you need, addresses for DNS server for the spesific networks and NTP server they can use.
Storage policy
For the deployment you also need to set up an storage policy that can be used. If you want tag based policy you need to setup the tag category and tags before running this, and adding it to the storage you want to use.
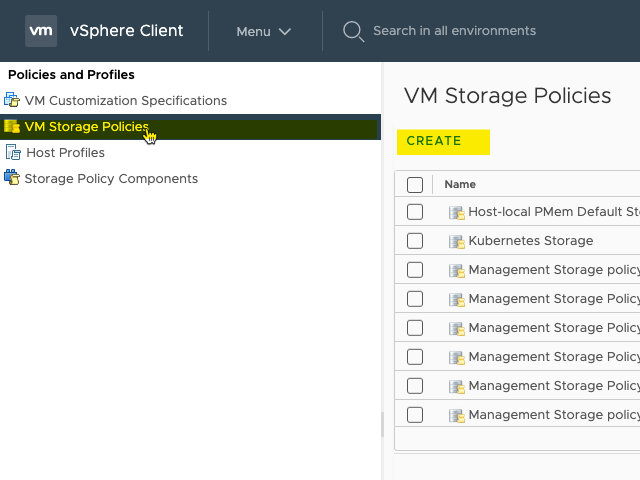
Go to “Policies and Profiles” in the menu.

Then go to “VM Storage Policies” and click “CREATE”.
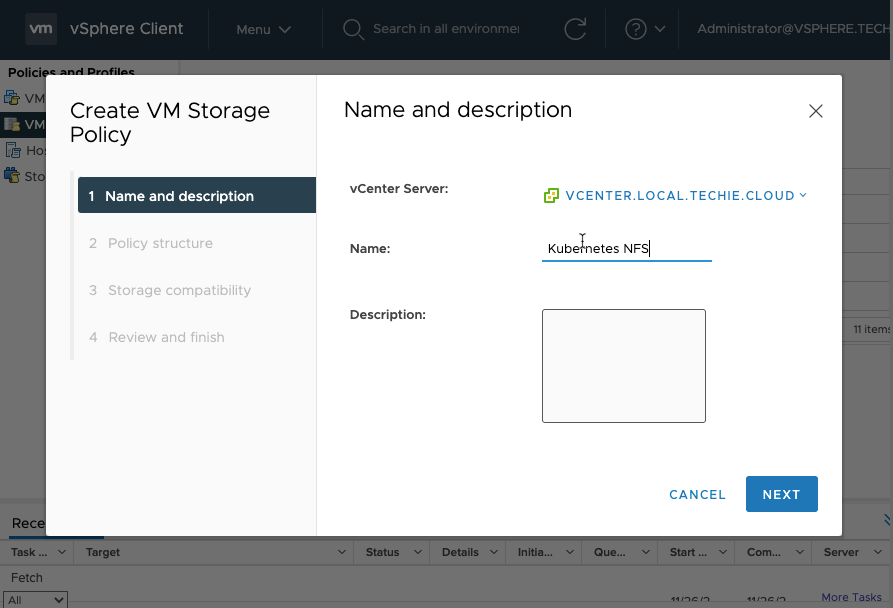
Enter a name for the policy and an description if you want.
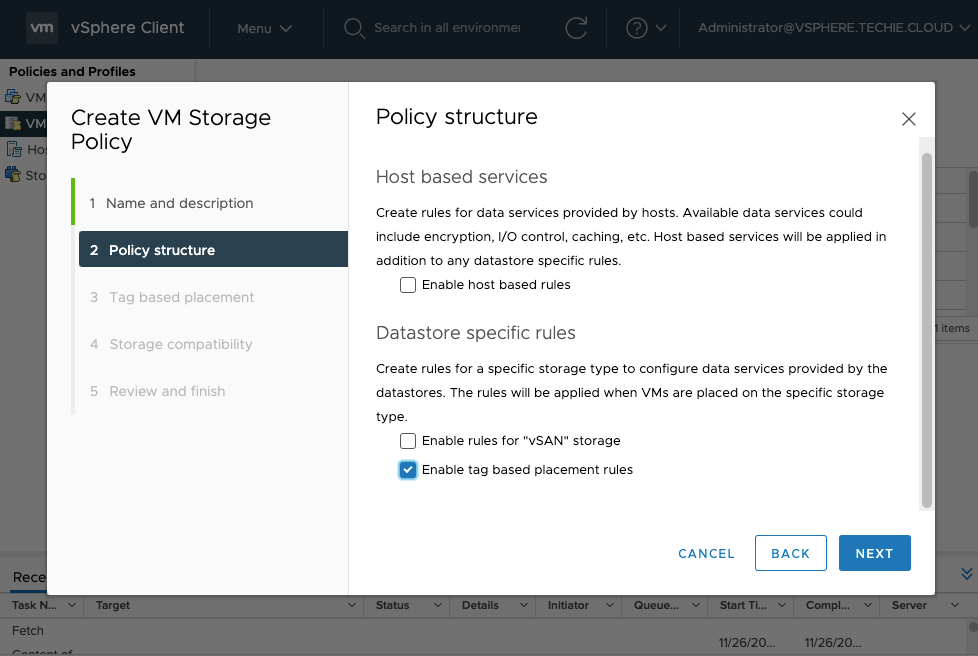
Choose the options you want here, for my setup I want the tag based option.
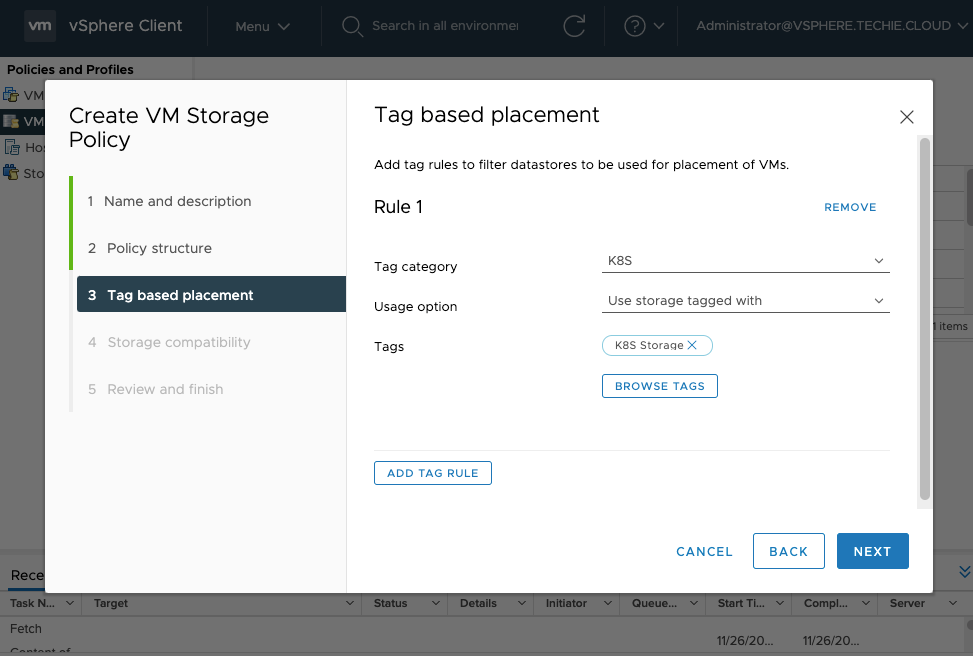
My tag category is the “K8S” and my tag is “K8S Storage”. This tag has been previously added to my NFS storage.
As can be seen it correctly displays my NFS storage as “Compatible”.
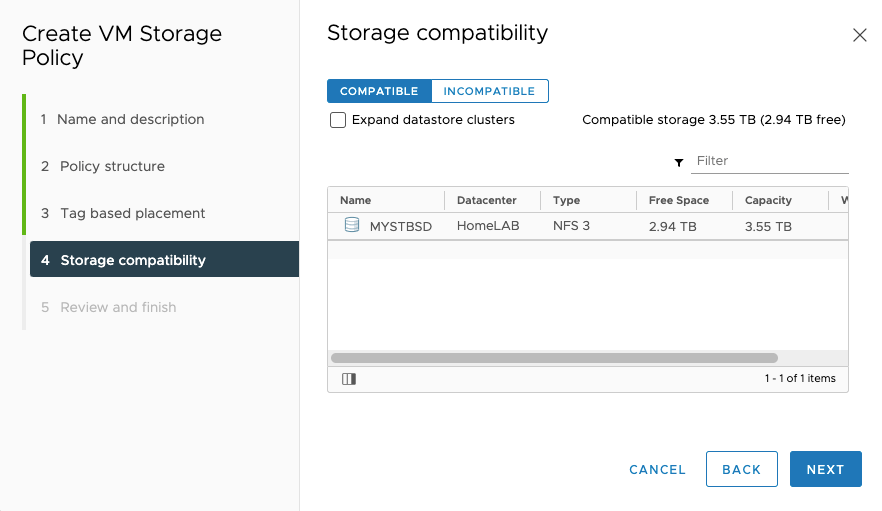
The just finish the wizard.
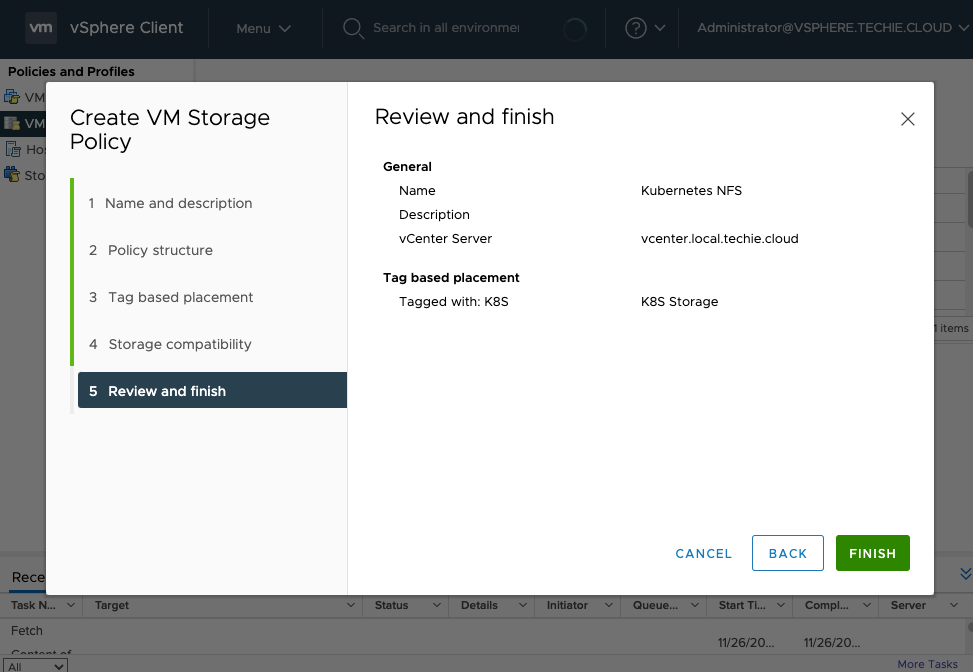
This is just an example tho, so this will need to be adapted to your spesific needs. I have another previous policy here called “Kubernetes Storage” that I will use later in the guide.
Content Library
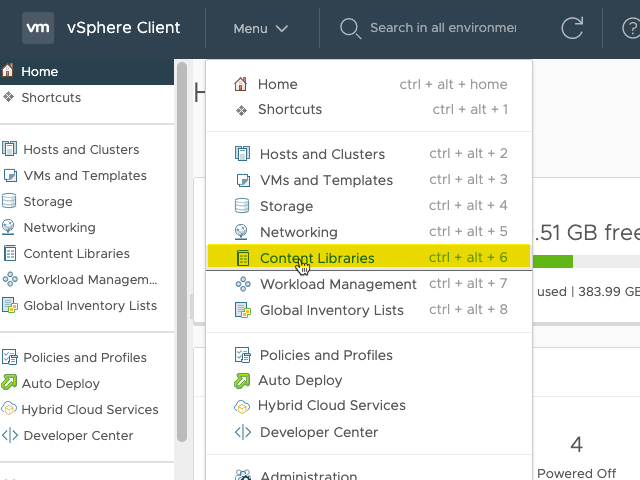
You also need to set up a content library. Go to “Content Libraries” in the menu.
Then click on “Create”.
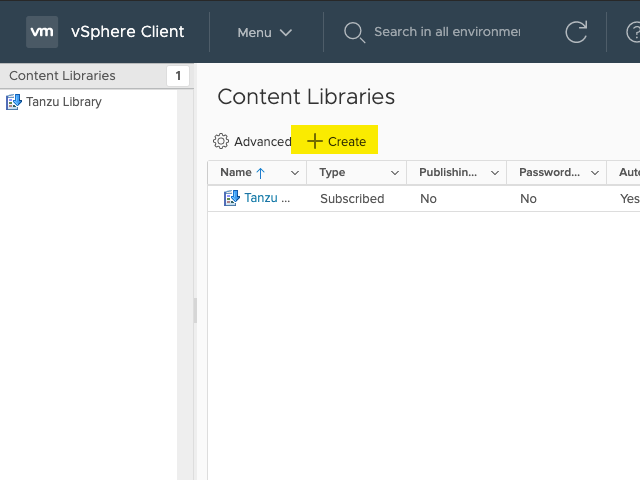
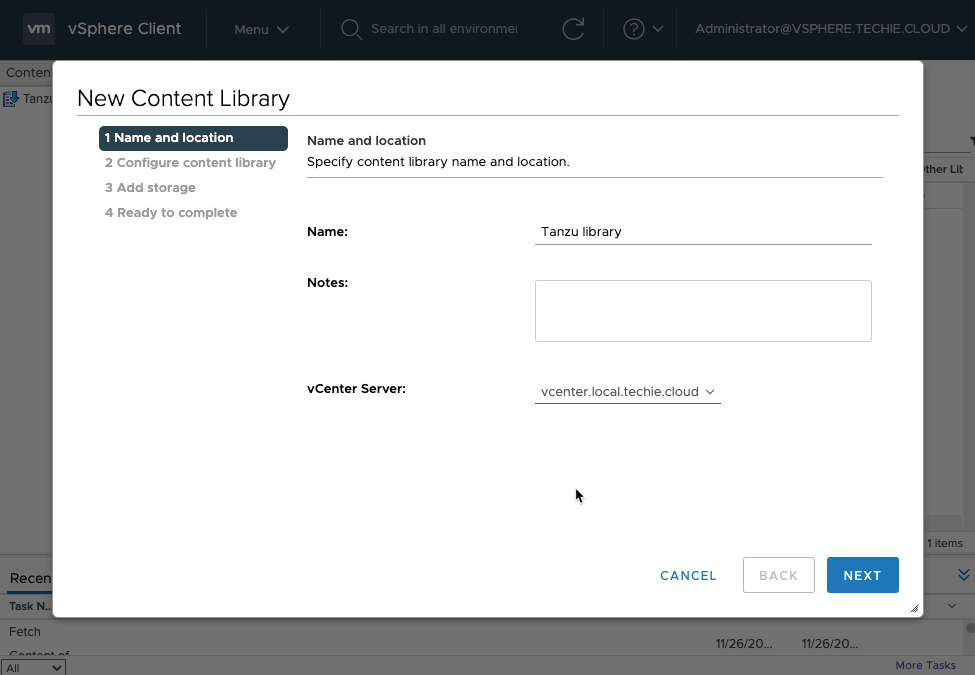
Enter a name for the library. I’m lazy, so I just call it “Tanzu library”.
Choose “Subscribed content library” and as of 2020.11.26 the “Subscription URL” is “https://wp-content.vmware.com/v2/latest/lib.json".
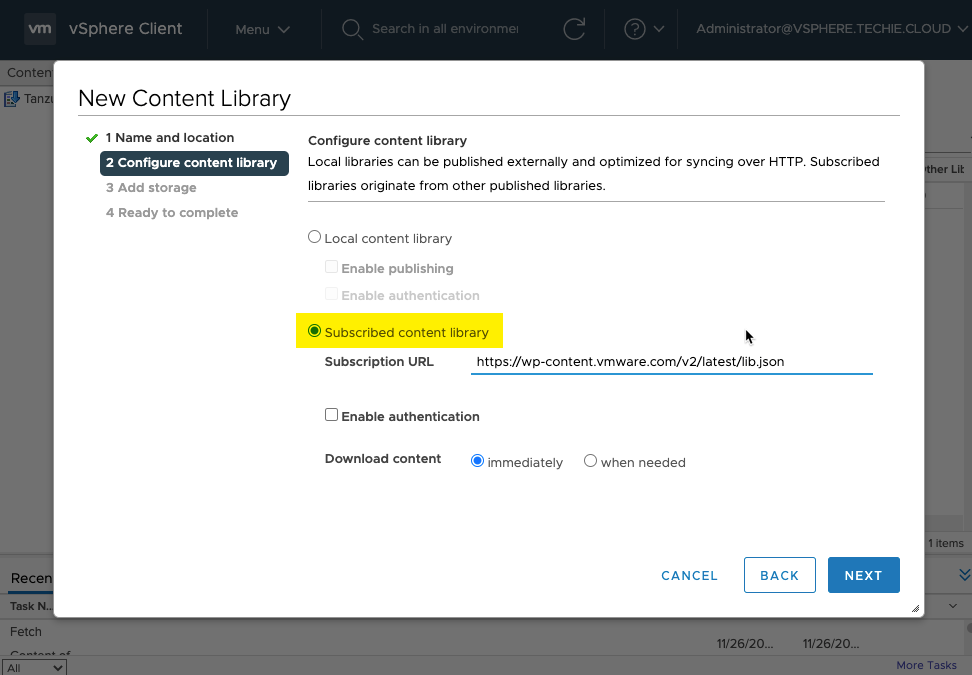
And I trust this.

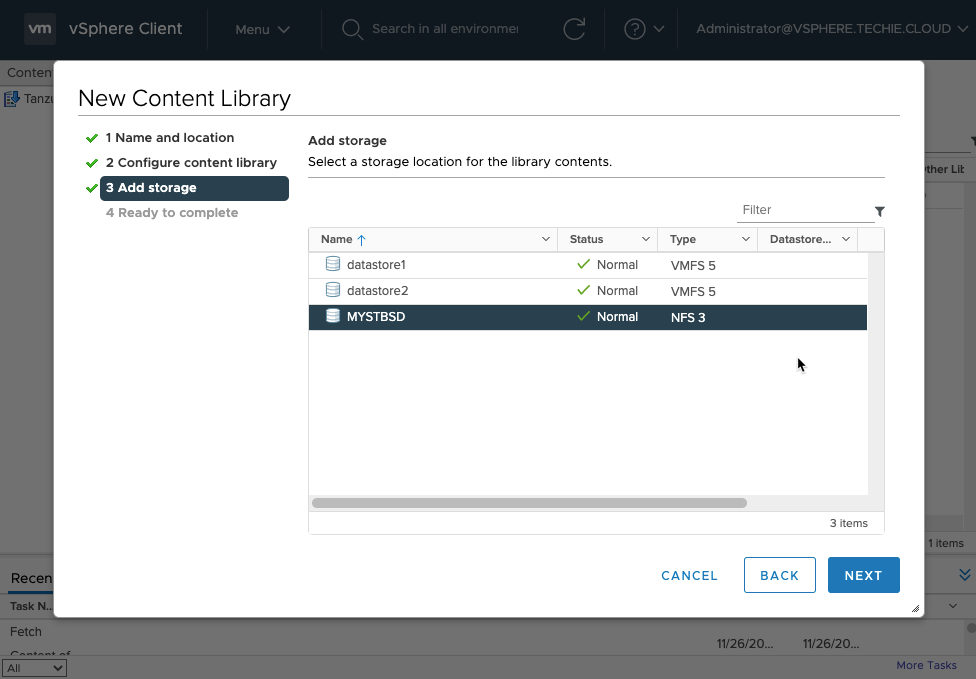
Then choose the storage you want to use for this. I put this on my NFS storage.
Then just finish the wizard.

Again, this is just an example of setup, and probably also will need to be adjusted to your needs. I assume at least different setup is needed here if your vSphere and management setup does not have internet access or similar.
Installing the components needed
Now we’re onto the good stuff and ready to start deploying stuff. First we need to deploy the HAproxy, as having the loadbalancing is a prerequisite to deploying workload management (Tanzu).
Installing HAproxy
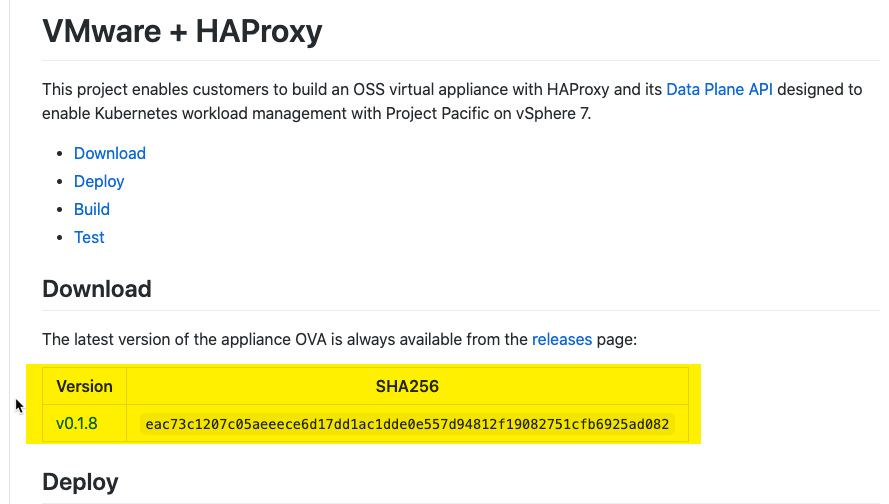
Step one is to get an hold of the correct installation of HAproxy, as the setup required it with their “dataplane” api software. I’m sure this can be setup manually, but I’m fine with using the pre-built appliance they have for deploying this.
The appliance is as of 2020.11.26 version 0.1.8 and is available here. Which version are available can be checked at their Github repository here.
Below is both a web gui walkthrough of the deployment, and the terraform code for deploying it directly. The terraform deployment currently have some snafus tho, especially for 3-leg deployment, so it might not be applicable for your use case.
Using the web gui
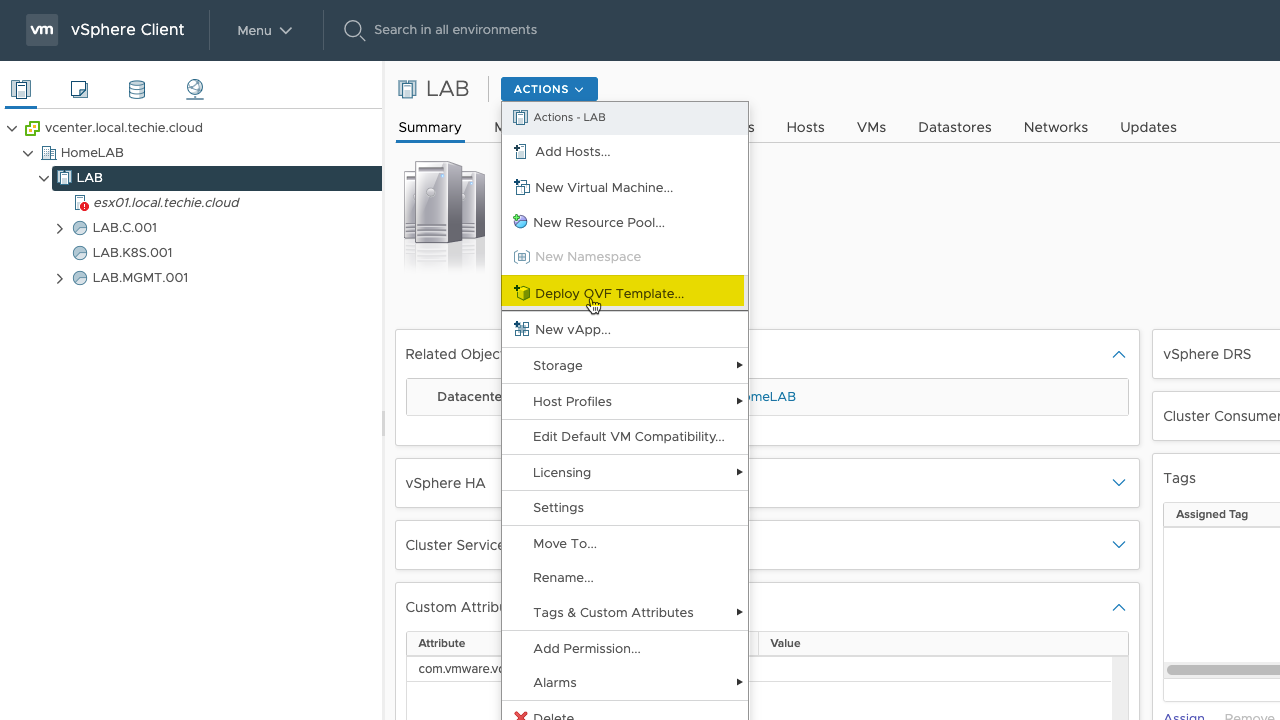
First you need to choose the “Deploy OVF Template…” in the actions menu of your cluster.
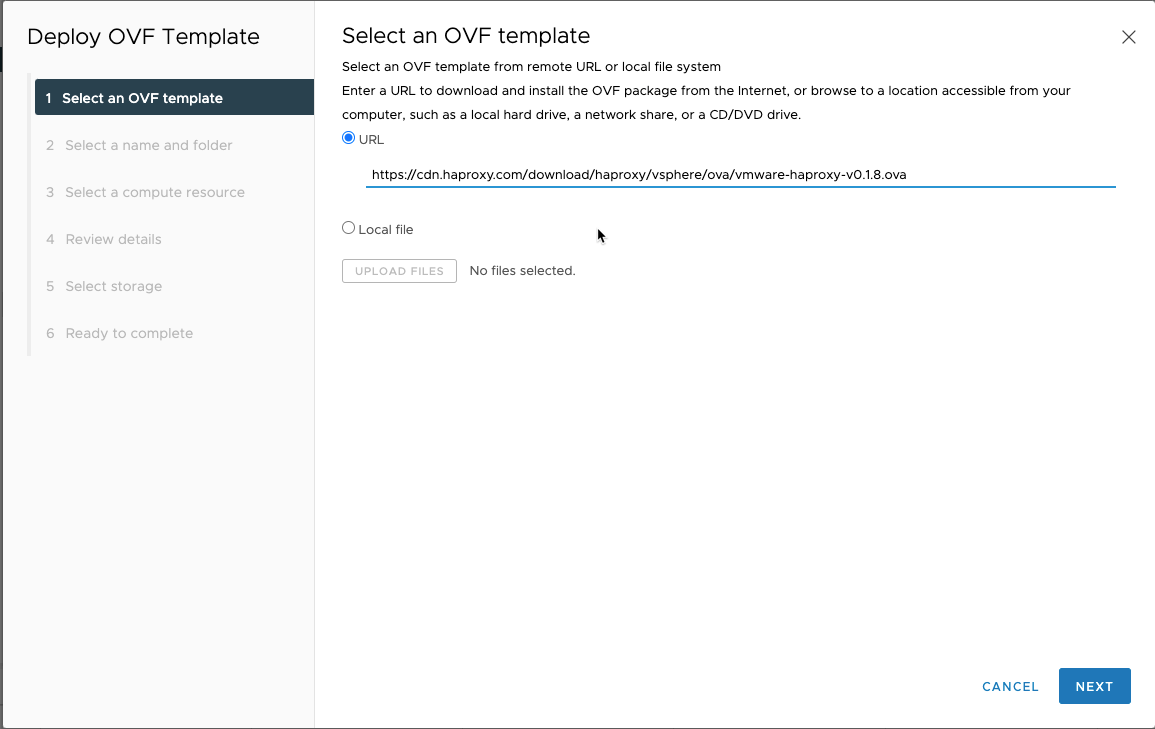
My management network in use for the vCenter have direct internet connection, so I’ll deploy the template directly from the internet, and just enter the URL for the OVA file.
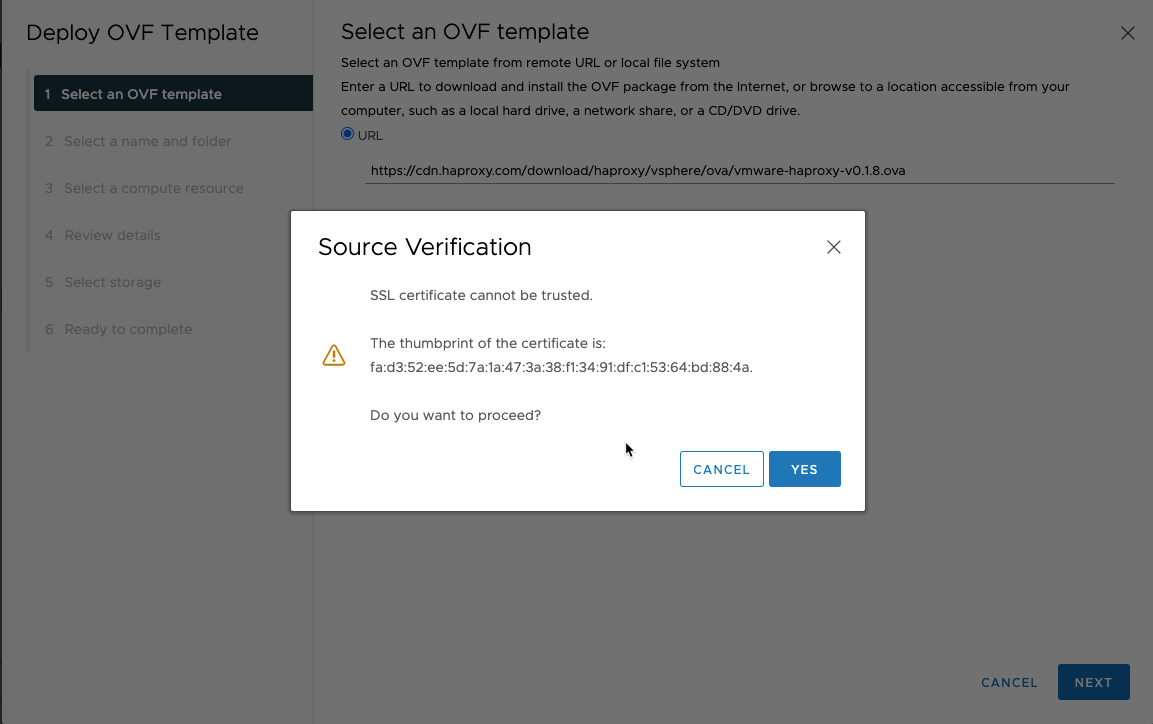
I’ll accept the “Source Verification”.
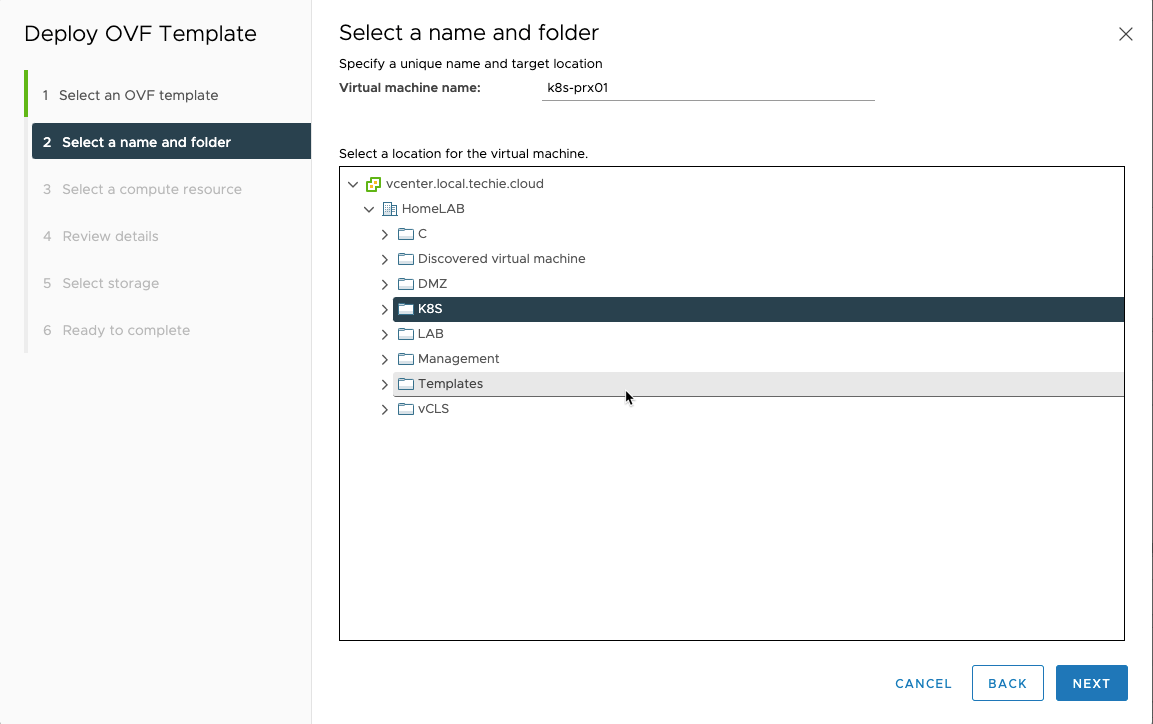
Choose a name for the VM, and a folder if needed.
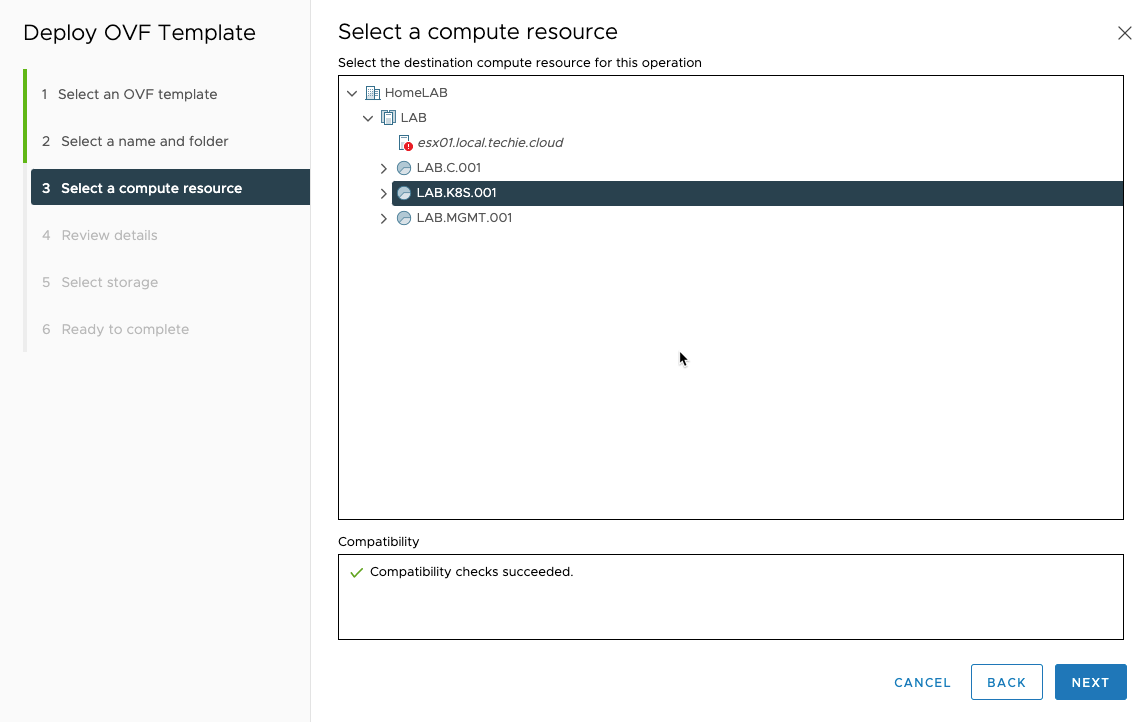
Then choose a compute resource if needed.
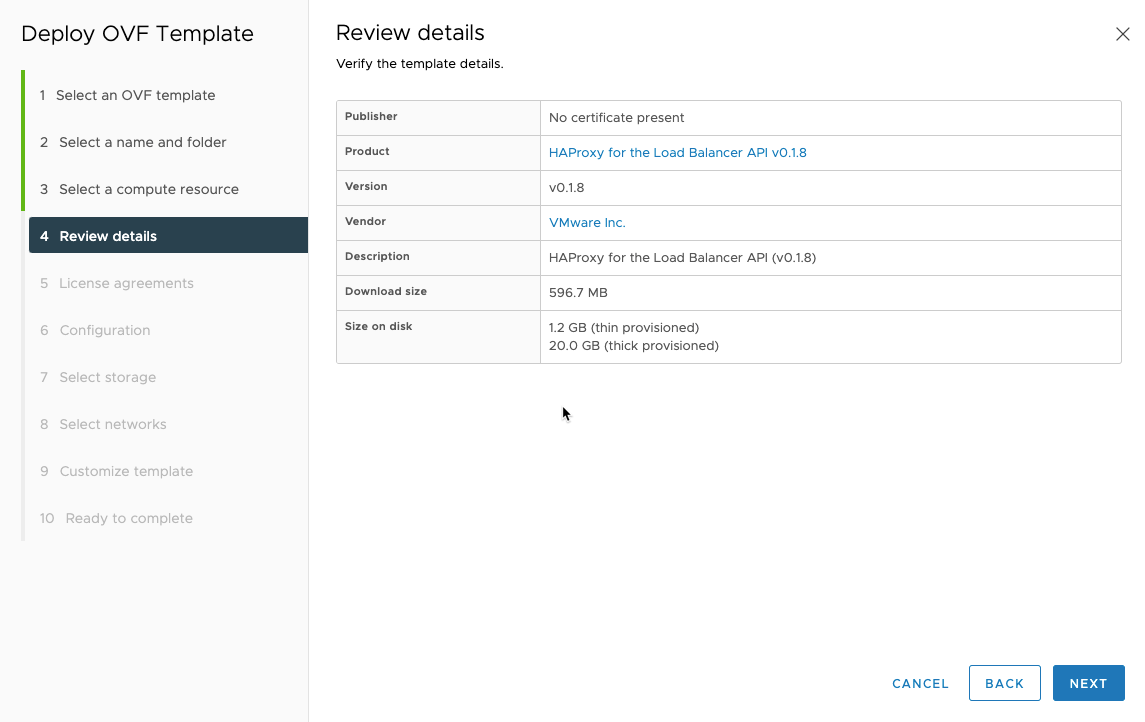
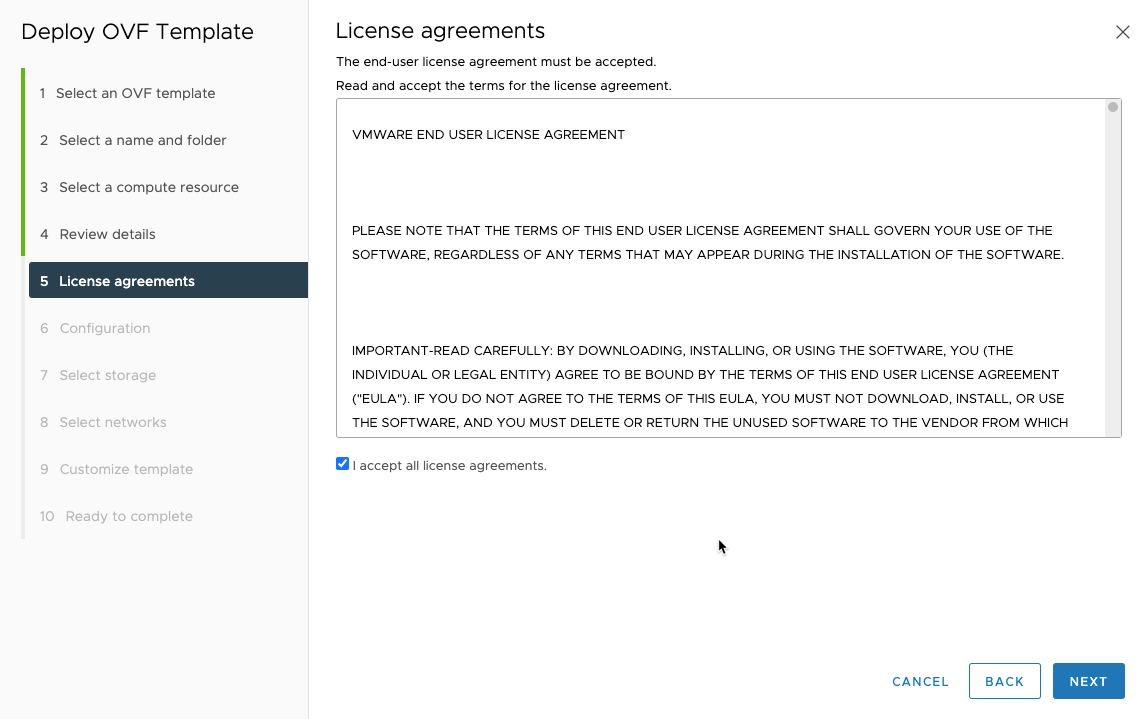
Read, and accept the license agreement.
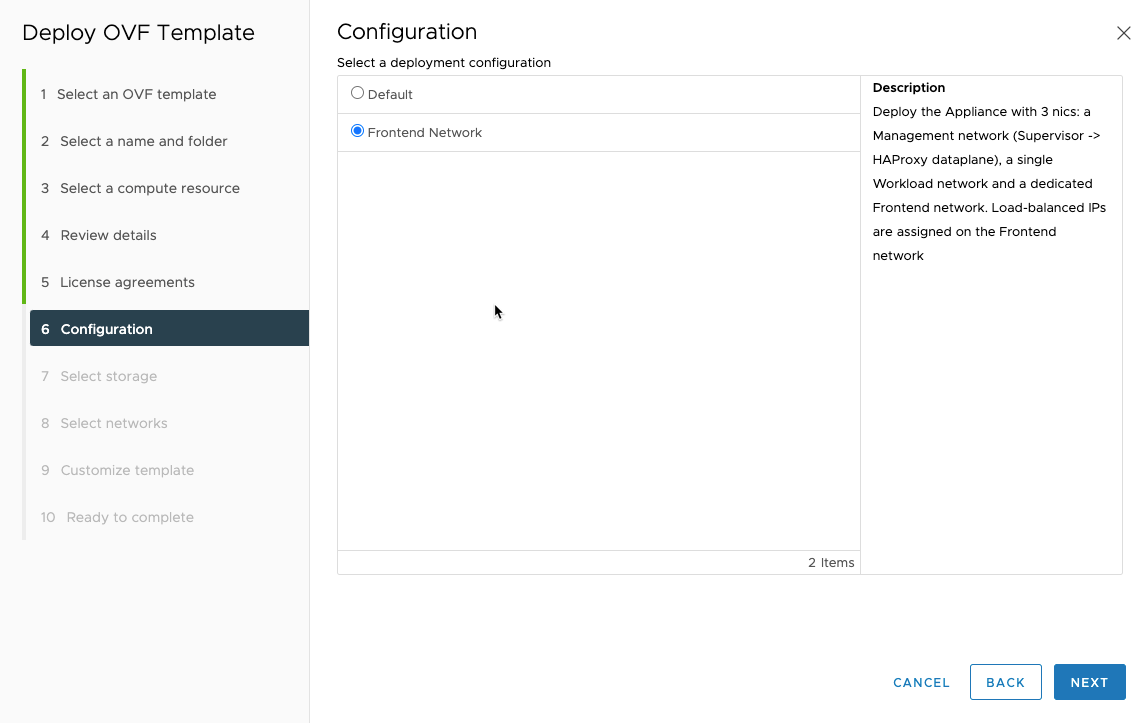
This is were you choose between the default 2-leg, or the 3-leg deployment with the added “Frontend” network for your deployment. The descriptions for the two are:
Default:
Deploy the Appliance with 2 nics: a Management network (Supervisor -> HAProxy dataplane) and a single Workload network. Load-balanced IPs are assigned on the Workload network. NOTE: Deployment will ignore all "frontend" optionsFrontend:
Deploy the Appliance with 3 nics: a Management network (Supervisor -> HAProxy dataplane), a single Workload network and a dedicated Frontend network. Load-balanced IPs are assigned on the Frontend networkFor my setup I go with the “Frontend Network” which is the 3-leg deployment. I’ll regret this later on as this created some issues for me down the line that I spent a lot of hours troubleshooting before I solved. For my setup with the pfSense firewall, the asymmetric routing this created in the setup, did not work very vell. Read more about that here.
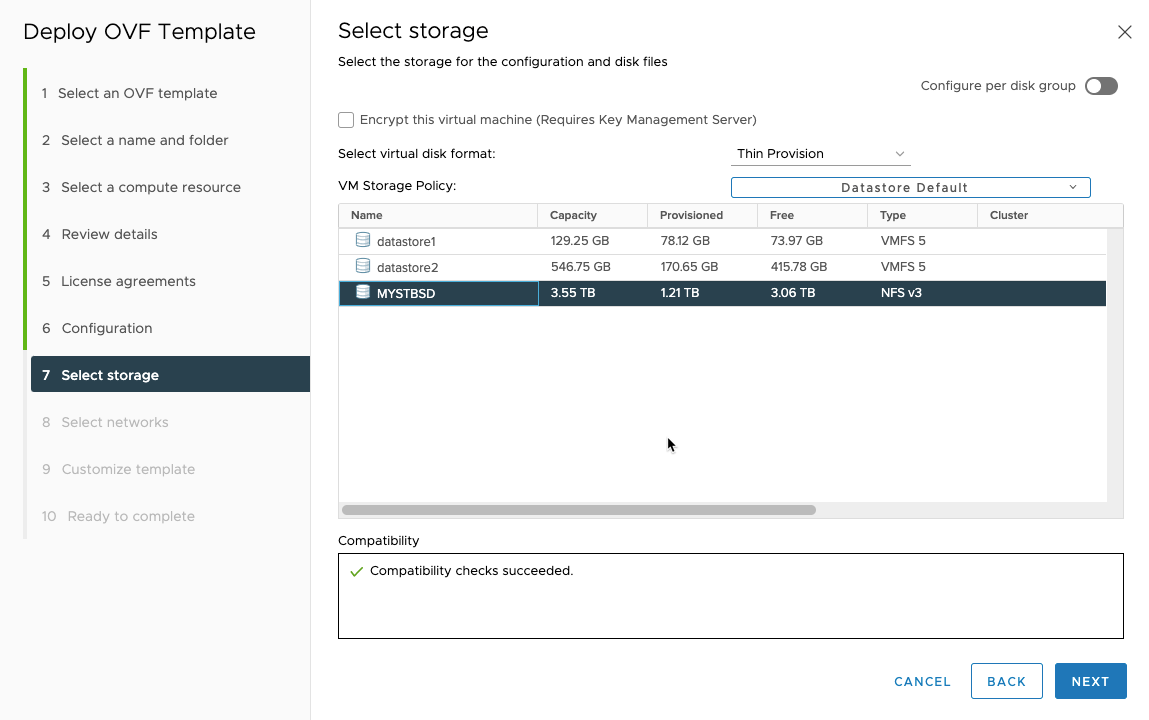
Choose the storage you want to use for this VM.
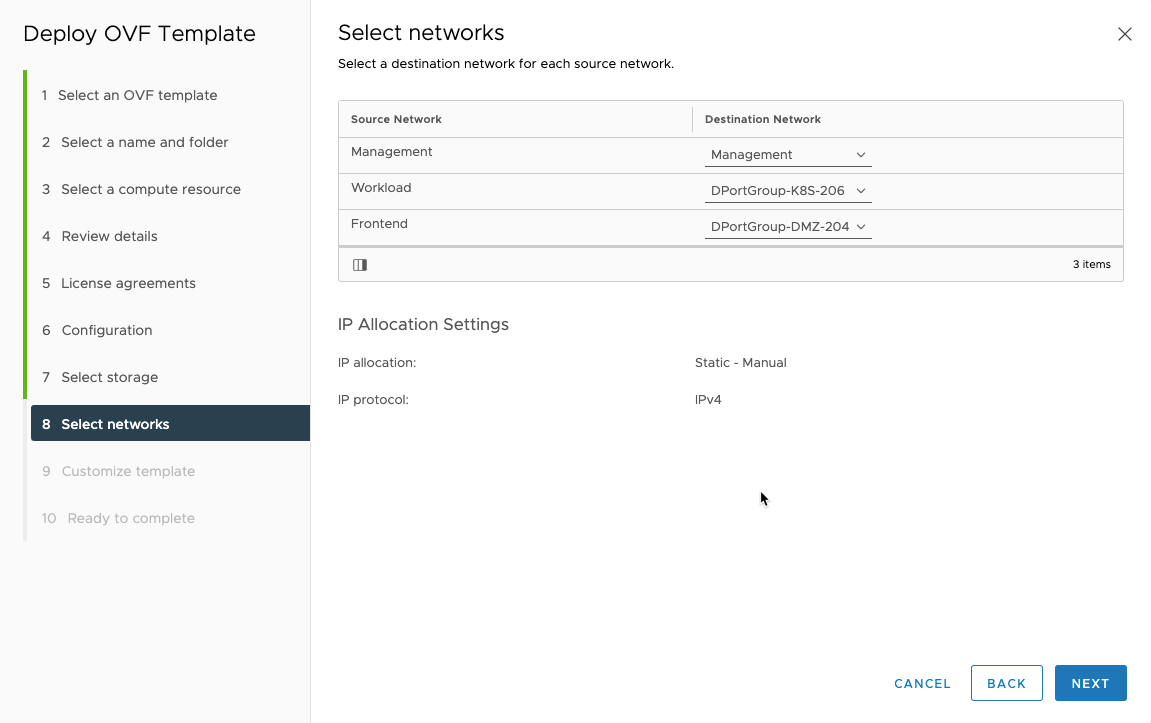
Select the networks you want to use for the different options.
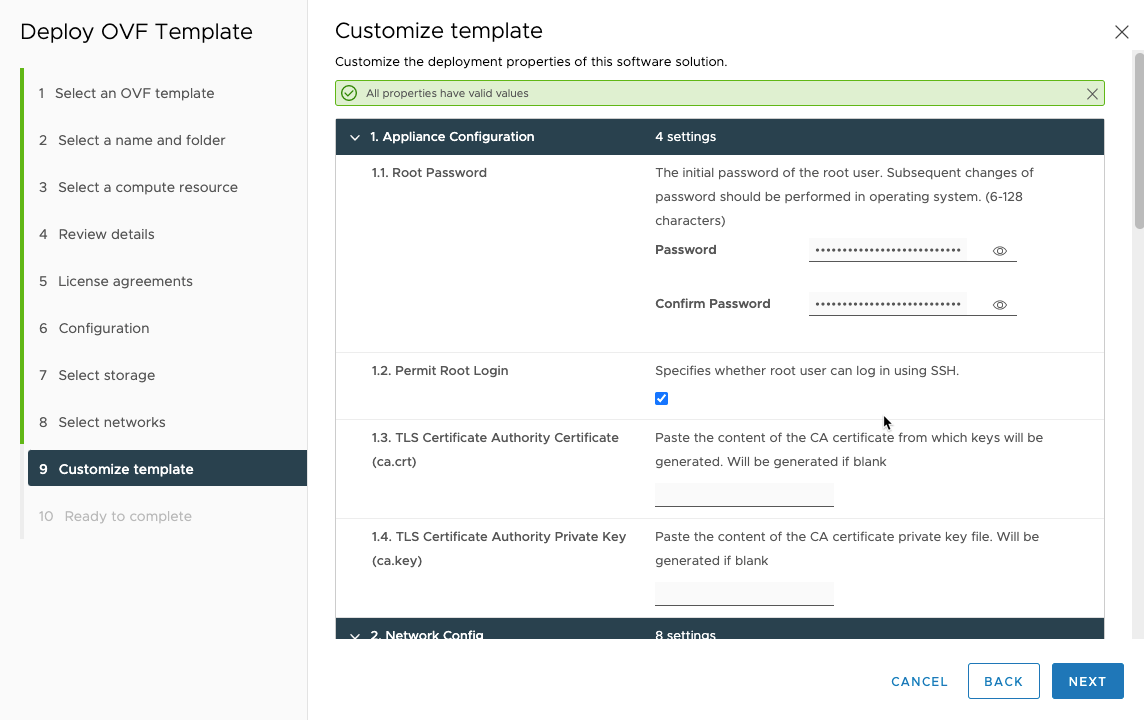
Then comes the customizations of the template, this is were you’ll use a lot of the network options previously mentioned.
Enter root password, choose if you want root to be allowed for ssh login, and either leave CA fields blank so they will be created or input some you have.
Choose the host name of your server, the DNS, Management network IP and subnet mask bit, management network gateway, workload network IP and subnet mask, and workload network gateway.
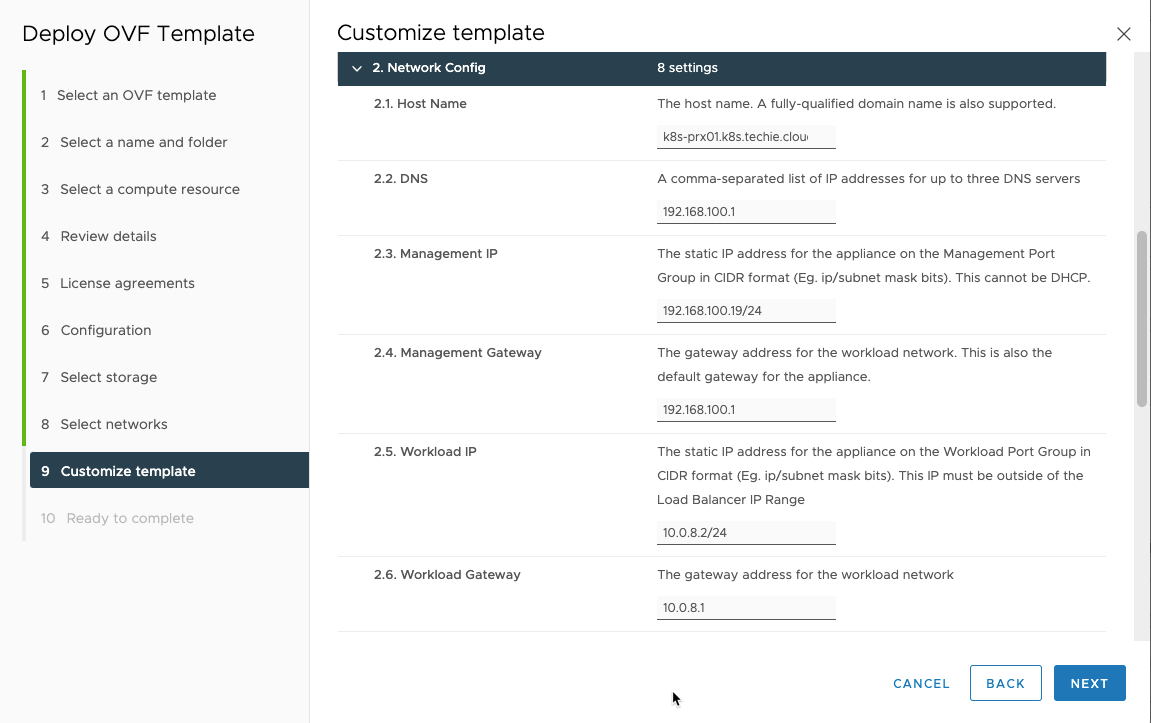
If you like me have chosen the 3-leg deployment, you also need to enter frontend network IP and subnet mask bit, and frontend netowkr gateway.
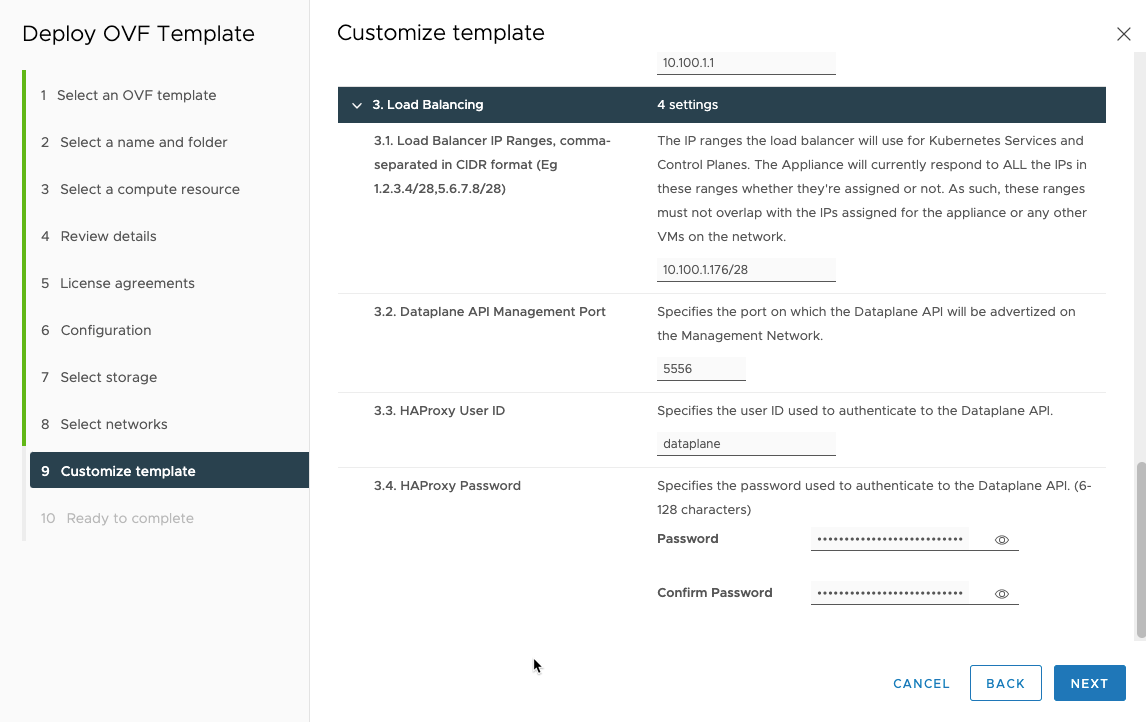
For the “3.1 Load Balancer IP Ranges” field, this is the IP addresses that will be used to expose services from your kubernetes cluster. On this deployment it is spesified with a subnet mask bit.
Then choose the dataplane API port. I left this as the default.
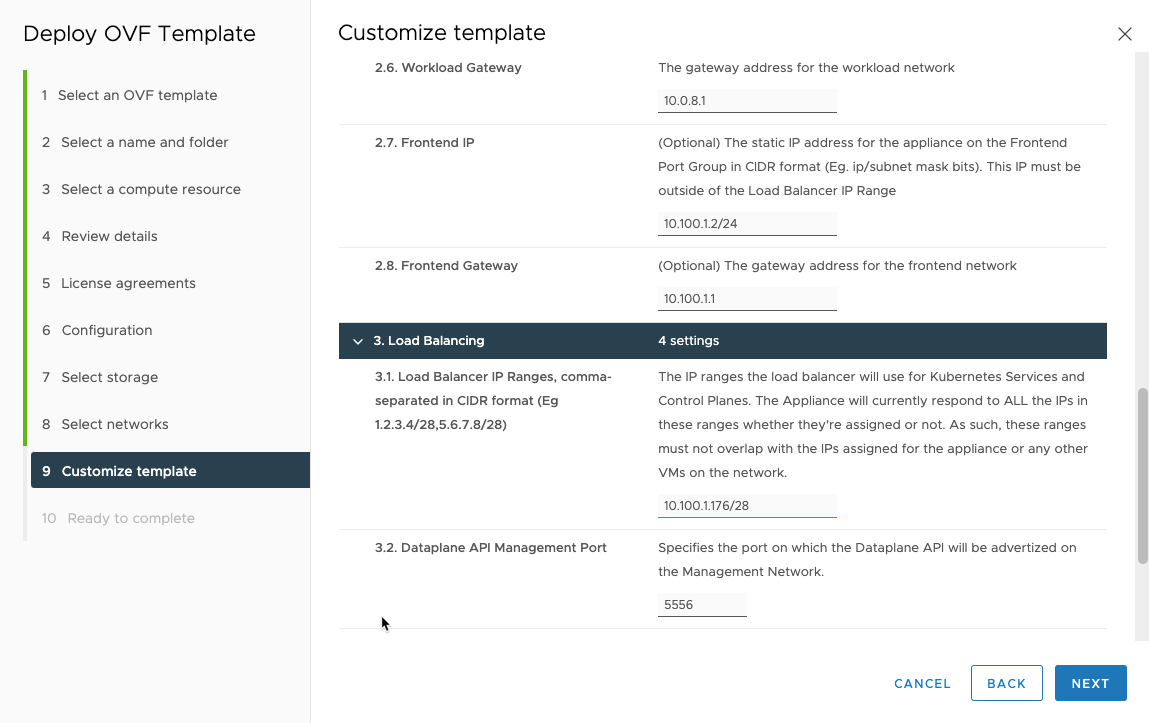
Then choose the HAproxy username and password used for the dataplane API.
Then you can review and finish the wizard.
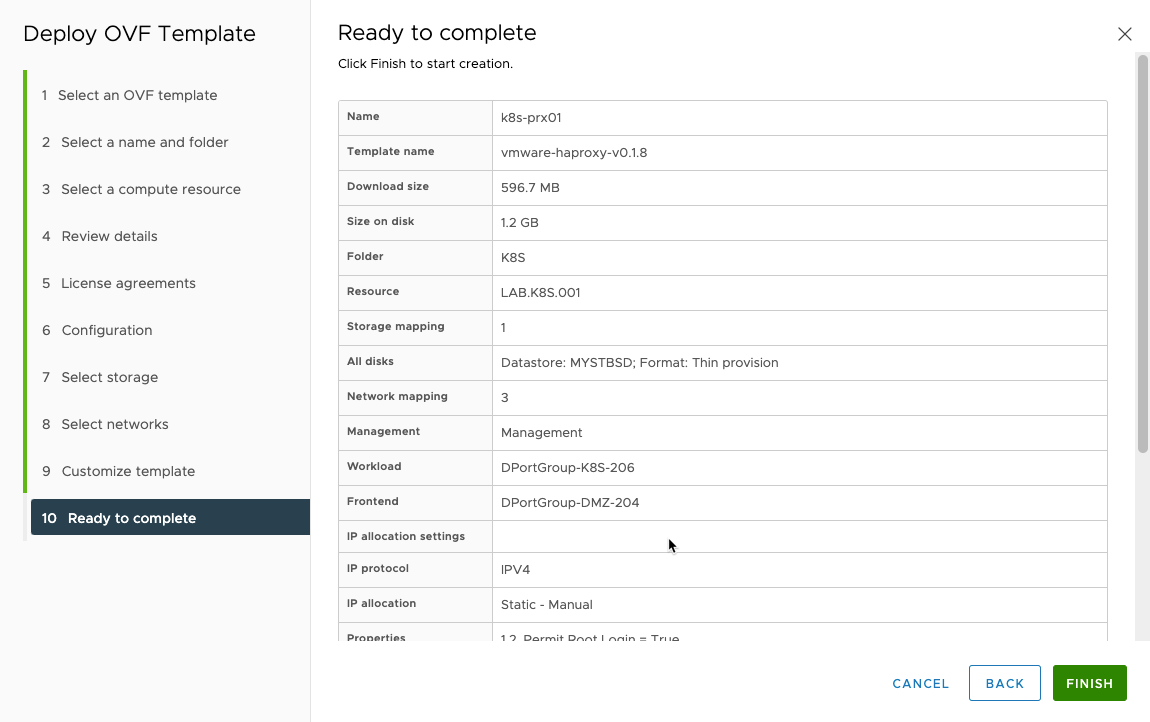
Now deploying the OVA image, this will take a little while to finish depending on performance of your rig.
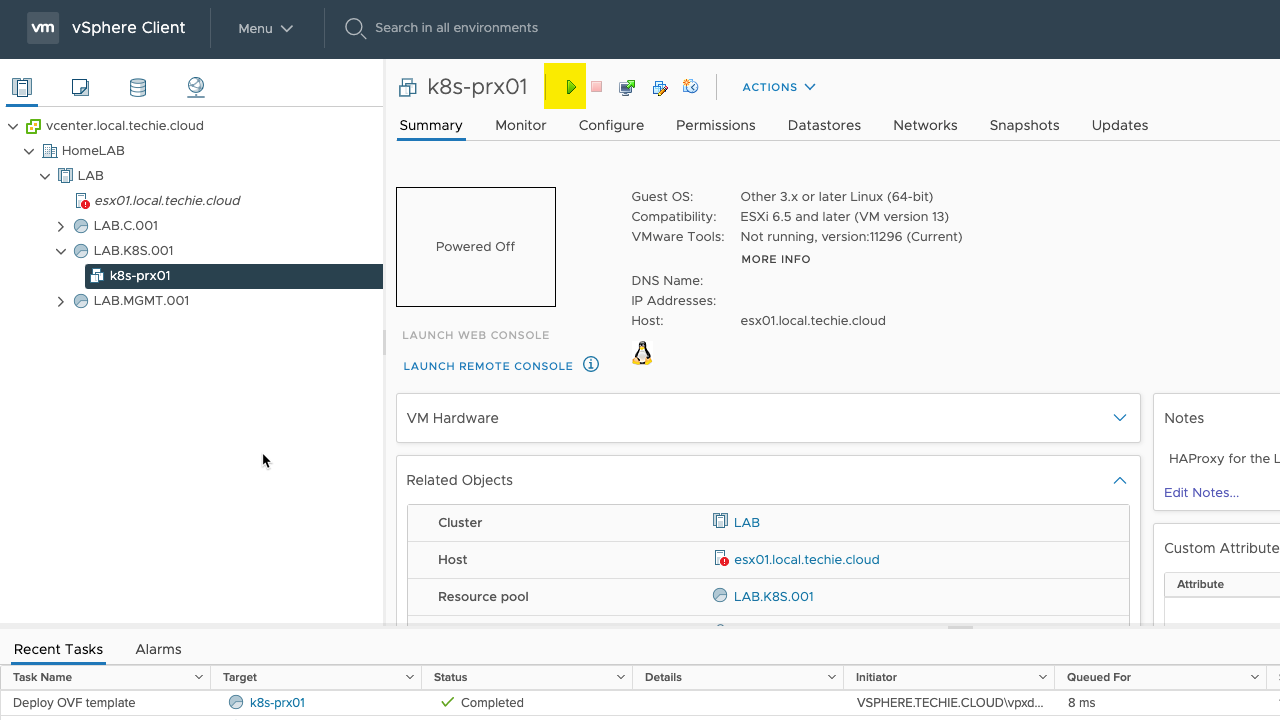
After the deployment is finished, you might need to start the VM.
Using Terraform
I also created the terraform code for deploying the aplliance, however there are a couple of snafus here currently.
There currently is a bug in the Terraform vSphere plugin version 1.24.1 and 1.24.2 that causes Terraform to panic when deploying OVA/OVF file without disk definitions, but it seems to have a comitted patch in #1241, so hopefully it is fixed in next version, but until then pin the plugin to version 1.24.0 or earlier.
Also there is an issue that it does not currently support deployment options in the OVA/OVF, so it is currently not possible to deploy the “frontend” option this way, leaving only the default 2-nic option. Hopefully this will also be included soo as someone has already made an PR #1215 for it.
terraform {
  required_providers {
    vsphere = {
      source  = "registry.terraform.io/hashicorp/vsphere"
      version = "= 1.24.0"
    }
  }
}

variable "vsphere_user" {
    default = "Administrator@vsphere.local"
}

variable "vsphere_password" {
    default = "VMware123!"
}

variable "vsphere_server" {
    default = "192.168.100.10"
}

provider "vsphere" {
  user           = var.vsphere_user
  password       = var.vsphere_password
  vsphere_server = var.vsphere_server

  persist_session = true
  client_debug = false
}

data "vsphere_datacenter" "dc" {
  name = "HomeLAB"
}

data "vsphere_host" "host" {
  name          = "192.168.100.9"
  datacenter_id = data.vsphere_datacenter.dc.id
}

data "vsphere_datastore" "datastore" {
  name          = "NFSStorage"
  datacenter_id = data.vsphere_datacenter.dc.id
}

data "vsphere_network" "network_management" {
  name          = "Management"
  datacenter_id = data.vsphere_datacenter.dc.id
}

data "vsphere_network" "network_workload" {
  name          = "DPortGroup-K8S-206"
  datacenter_id = data.vsphere_datacenter.dc.id
}

data "vsphere_network" "network_frontend" {
  name          = "DPortGroup-DMZ-204"
  datacenter_id = data.vsphere_datacenter.dc.id
}

data "vsphere_resource_pool" "resources_pool" {
  name          = "Resources"
  datacenter_id = data.vsphere_datacenter.dc.id
}

resource "vsphere_resource_pool" "vm_resource_pool" {
  name                    = "LAB.K8S.002"
  parent_resource_pool_id = data.vsphere_resource_pool.resources_pool.id
}

resource "vsphere_virtual_machine" "haproxyvm" {
  name                       = "k8s-prx02"
  resource_pool_id           = vsphere_resource_pool.vm_resource_pool.id
  datastore_id               = data.vsphere_datastore.datastore.id
  host_system_id             = data.vsphere_host.host.id
  folder	  	               = "K8S"
  wait_for_guest_net_timeout = 0
  wait_for_guest_ip_timeout  = 0
  datacenter_id              = data.vsphere_datacenter.dc.id
  ovf_deploy {
    remote_ovf_url = "https://cdn.haproxy.com/download/haproxy/vsphere/ova/vmware-haproxy-v0.1.8.ova"
    disk_provisioning    = "thin"
    ip_protocol          = "IPv4"
    ip_allocation_policy = "STATIC_MANUAL"
    ovf_network_map = {
      "Management" = data.vsphere_network.network_management.id
      "Workload" = data.vsphere_network.network_workload.id
      "Frontend" = data.vsphere_network.network_frontend.id
    }
  }
  vapp {
    properties = {
      "permit_root_login" = "True"
      "root_pwd" = "root"
      "ca_cert" = ""
      "ca_cert_key" = ""
      "hostname" = "k8s-prx02"
      "nameservers" = "192.168.100.1"
      "management_ip" = "192.168.100.20/24"
      "management_gateway" = "192.168.100.1"
      "workload_ip" = "10.0.8.3/24"
      "workload_gateway" = "10.0.8.1"
      "service_ip_range" = "10.100.1.176/28"
      "dataplane_port" = "5556"
      "haproxy_user" = "dummy"
      "haproxy_pwd" = "password"
    }
  }
}
Installing VMware Tanzu
After HAproxy has been deployed, and is running, then it’s time to deploy workload management (Tanzu).
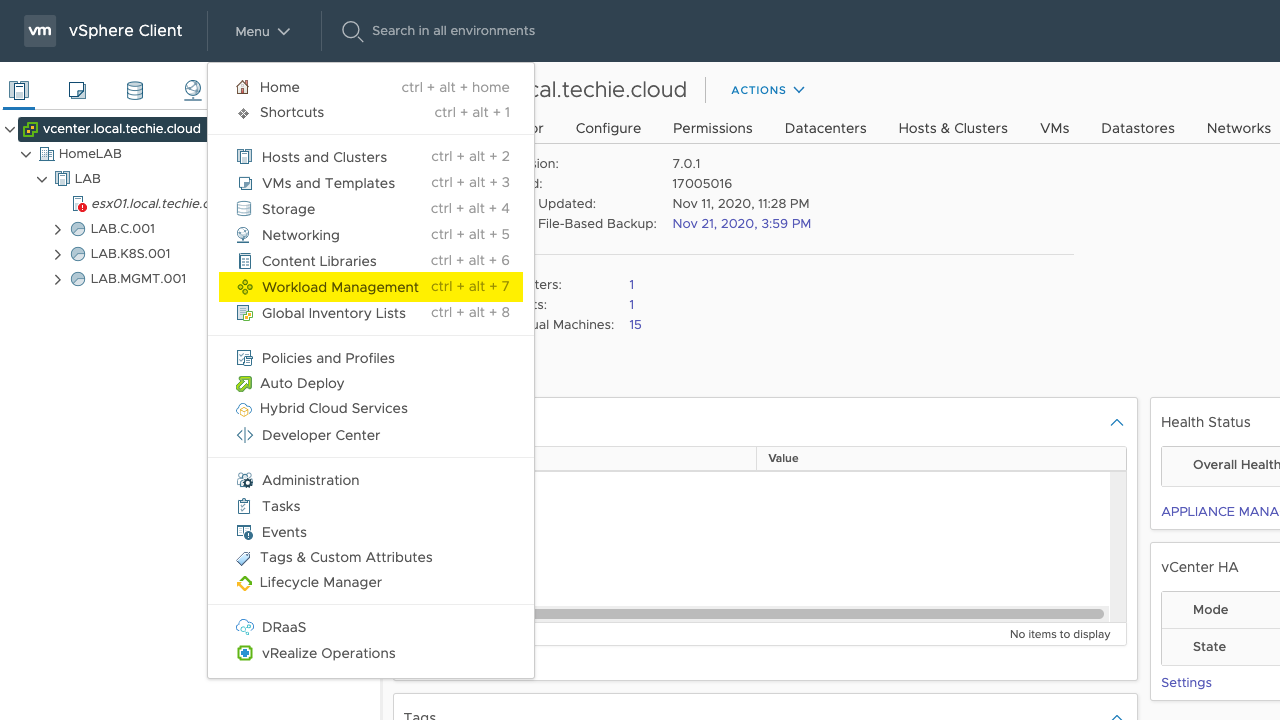
Open “Workload Management” in the menu of vCenter.
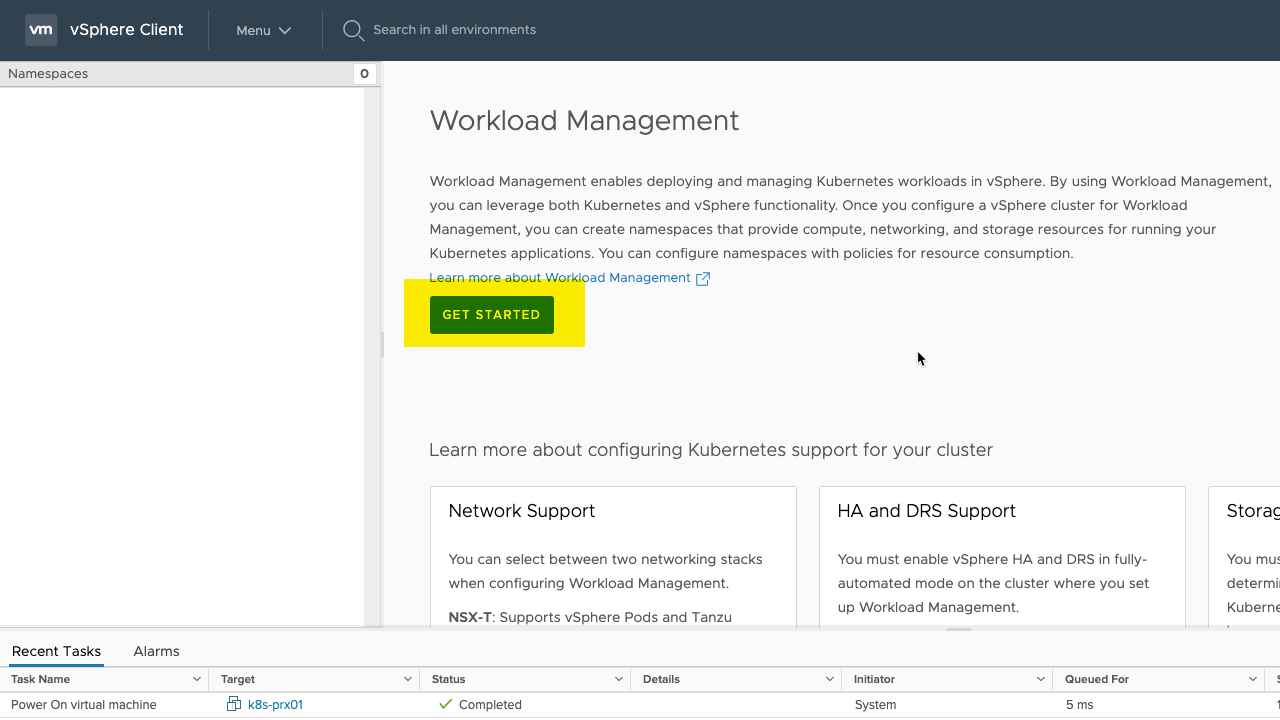
Initially I had an issue here were I could not deploy the workload management, as it only presented a page saying “None of the hosts connected to this vCenter are licensed for Workload Management”. After googling this I found the answer on this blog. If you get the same issue, open vCenter in private/incognito mode in your browser and it should then work.
When it’s working it will look like this, and you can click the button “GET STARTED”.
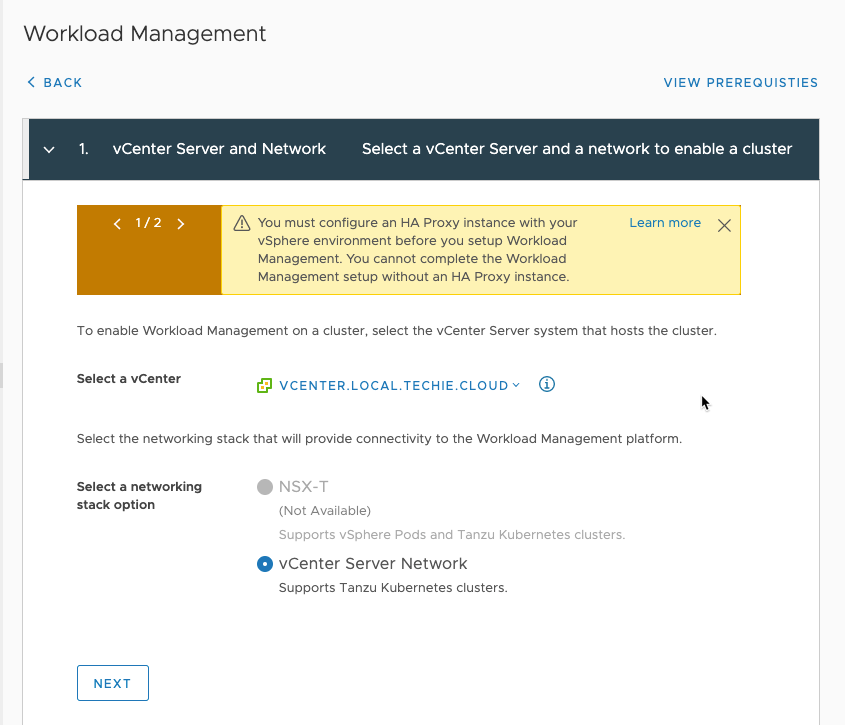
As previously mentioned I do not have NSX-T set up on my vCenter, so the only choice available to me is the “vCenter Server Network” which is the HAproxy only option currently.
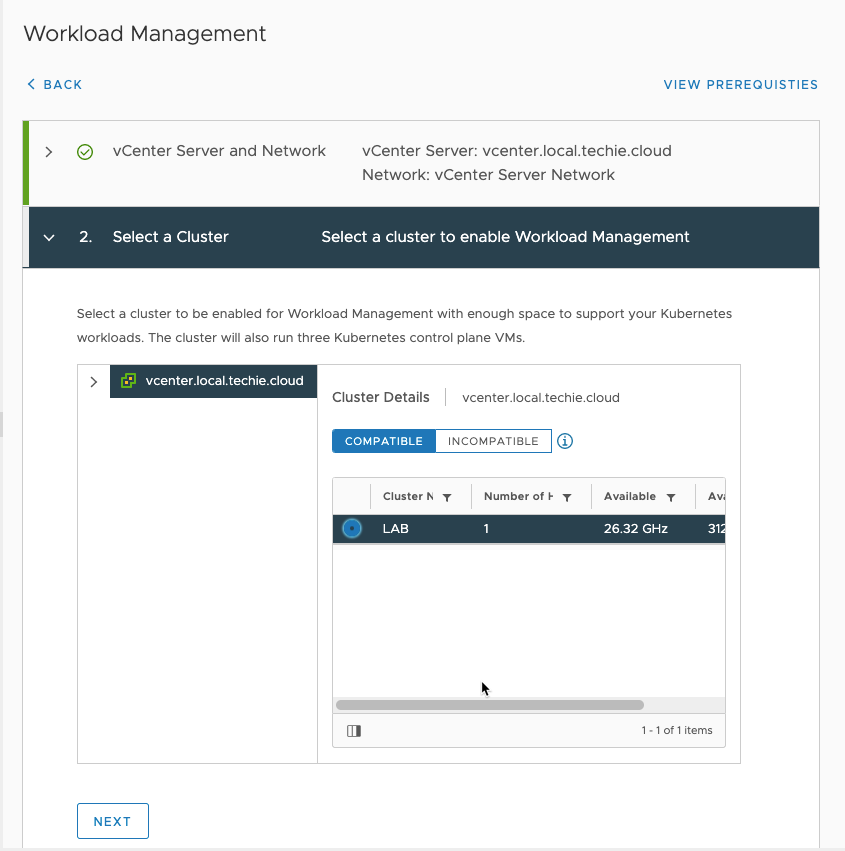
I only have one cluster in my setup, so that is the only choice for me.
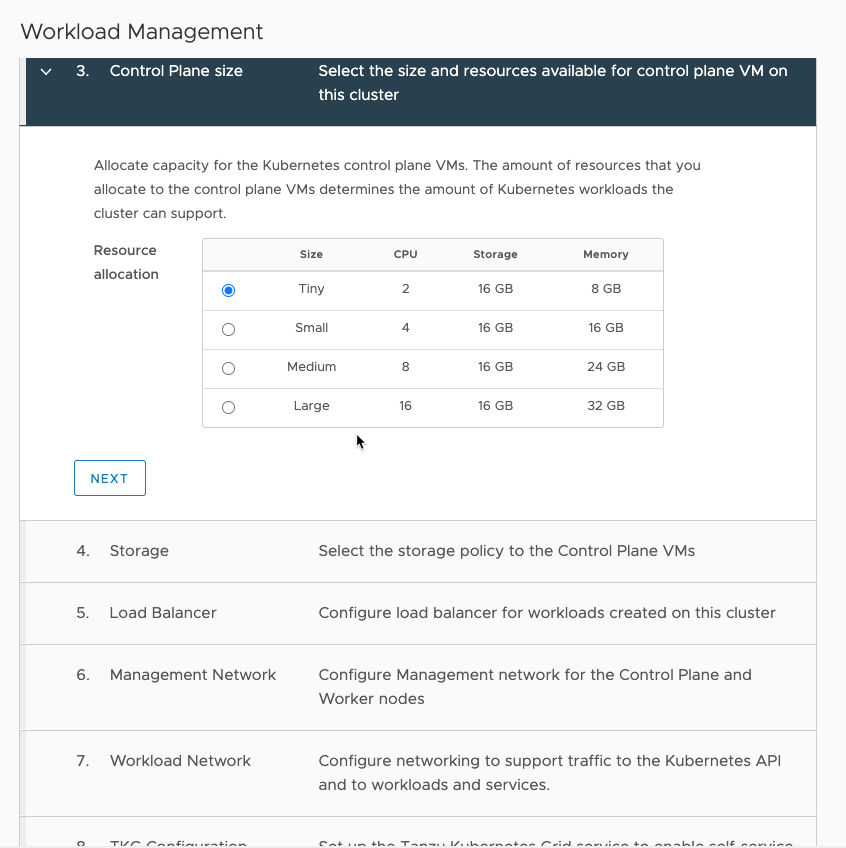
Then choose your preferred size of the Control Plane. In my lab setup I go for the “Tiny” option. I have not currently found any resources detailing the consequences on this choise vs what amount of workloads you can run.
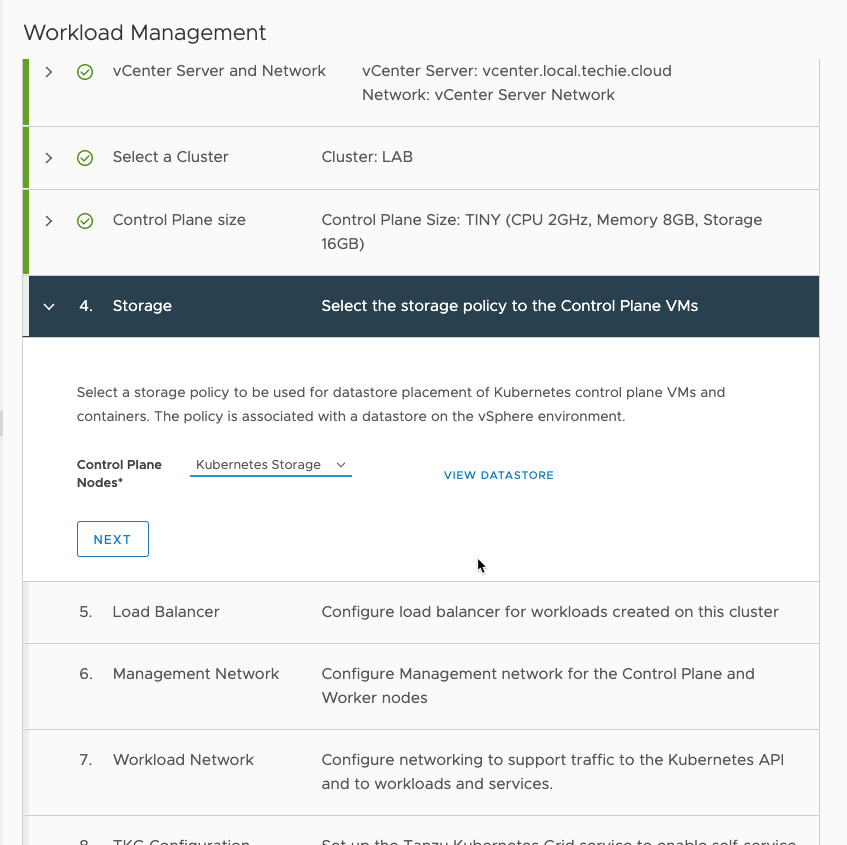
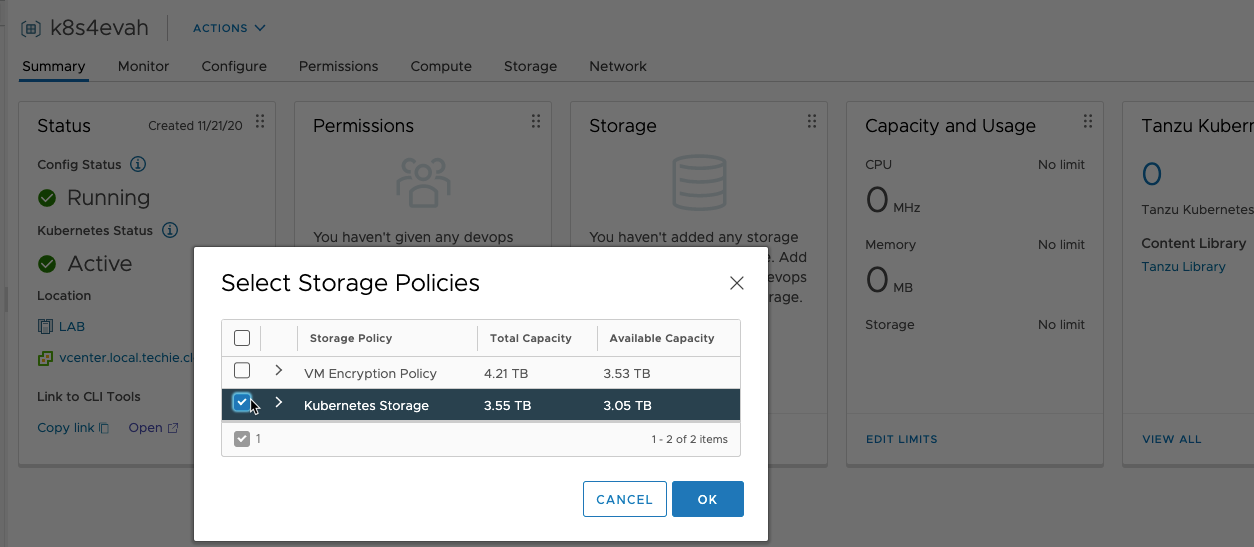
Then choose the storage policy your created earlier.
Then choose the name of your HAproxy loadbalancer, I’ve just used the name of the VM here to identify it.
As “Type” you currently have only the choice of “HA Proxy” as that is the only supported solution as of 2020.11.26.
Then you need to enter the address where the HAproxy dataplane API is reachable. I’ve used the dns name of the host here, but you can also use the IP address used as management IP and the dataplane port used in the HAproxy deployment.
Then enter the same HAproxy API username and password as you used in the HAproxy deployment.
“IP Address Ranges for Virtual Servers” is the same as “3.1 Load Balancer IP Ranges” used in the HAproxy deployment, but this time spesified as an IP range instead of an subnet mask bit.
Then you need to fetch the CA certificate that the HAproxy is using and paste into “Server Certificate Authority” field. If you used one you have in the HAproxy deployment, then just paste the same here, or if your left it blank, then you need to ssh into the HAproxy server you deployed and copy it.
For example, this is mine:
root@k8s-prx01 [ ~ ]# cat /etc/haproxy/ca.crt
-----BEGIN CERTIFICATE-----
MIIDozCCAougAwIBAgIJAKYREnBazjLeMA0GCSqGSIb3DQEBBQUAMG8xCzAJBgNV
BAYTAlVTMRMwEQYDVQQIDApDYWxpZm9ybmlhMRIwEAYDVQQHDAlQYWxvIEFsdG8x
DzANBgNVBAoMBlZNd2FyZTENMAsGA1UECwwEQ0FQVjEXMBUGA1UEAwwOMTkyLjE2
OC4xMDAuMTkwHhcNMjAxMTIxMTcwMTUzWhcNMzAxMTE5MTcwMTUzWjBvMQswCQYD
VQQGEwJVUzETMBEGA1UECAwKQ2FsaWZvcm5pYTESMBAGA1UEBwwJUGFsbyBBbHRv
MQ8wDQYDVQQKDAZWTXdhcmUxDTALBgNVBAsMBENBUFYxFzAVBgNVBAMMDjE5Mi4x
NjguMTAwLjE5MIIBIjANBgkqhkiG9w0BAQEFAAOCAQ8AMIIBCgKCAQEAvFgq7rX3
kbndu7jwkv4f50ChiyU03XK4dqBs9AFrcnd/rZ0OQtkRex5Yn3VFUhNsjeI8ct/p
+E700VVzvzYt4QMiI62coQMy5JHH1FOQ5ZcB6B+qCsh7z4c/8xi0/Rf7KKR8takc
YiaVK394XUKSWe0CAnyXo/SYz7h9szZ+KEETh4quG0xSqQ8yiJh9jaNDVUgUy4Ug
DJjhzQv969xbQiYz0EQUwmuDVlfhODu7RfmS/VB9SVYPCXWZFNpqTaIoERisKHGM
9Cuc7kacxnmYg5jAz2N/FJ5GR0TRGga8KkILBn8k30HXh/jwYrNSIAvXJKOXb2q0
Hq7BGpESyyTvwwIDAQABo0IwQDAPBgNVHRMBAf8EBTADAQH/MA4GA1UdDwEB/wQE
AwIBhjAdBgNVHQ4EFgQURBUVilU9abfzUOtZq2wRjFa4PMkwDQYJKoZIhvcNAQEF
BQADggEBAEa26OMnR9rsVvbJ+VfIm0gPRFI5l1whZ+UOqHJm6CiGJNygwHcL0taO
qu60zCVd933Evqb+VgsHB2c0C3kZTbECdbz0b3fcm55Hgm9cjtMb8tw111rX4ApE
WFZ8reeHeIYuTsFpIIQWdf3Au+APg8rMxw0JD0NJidkl0leWU8CC41O2dRedUg8t
m7DvwNvRC/rXId/L3TBPj/0BvtgcPMoG6WqREoW7ZNgKtRDjUOERH7iRmu7p5vQ/
Mms4SrY/MEH8RH3zdoGP54ffo9vSif7SBxQ5afUHbrfNFgueBjzKHhZ1Zm5og3kW
AT4bQsrdrUT3TDiez1lbM+3A8Ri/pao=
-----END CERTIFICATE-----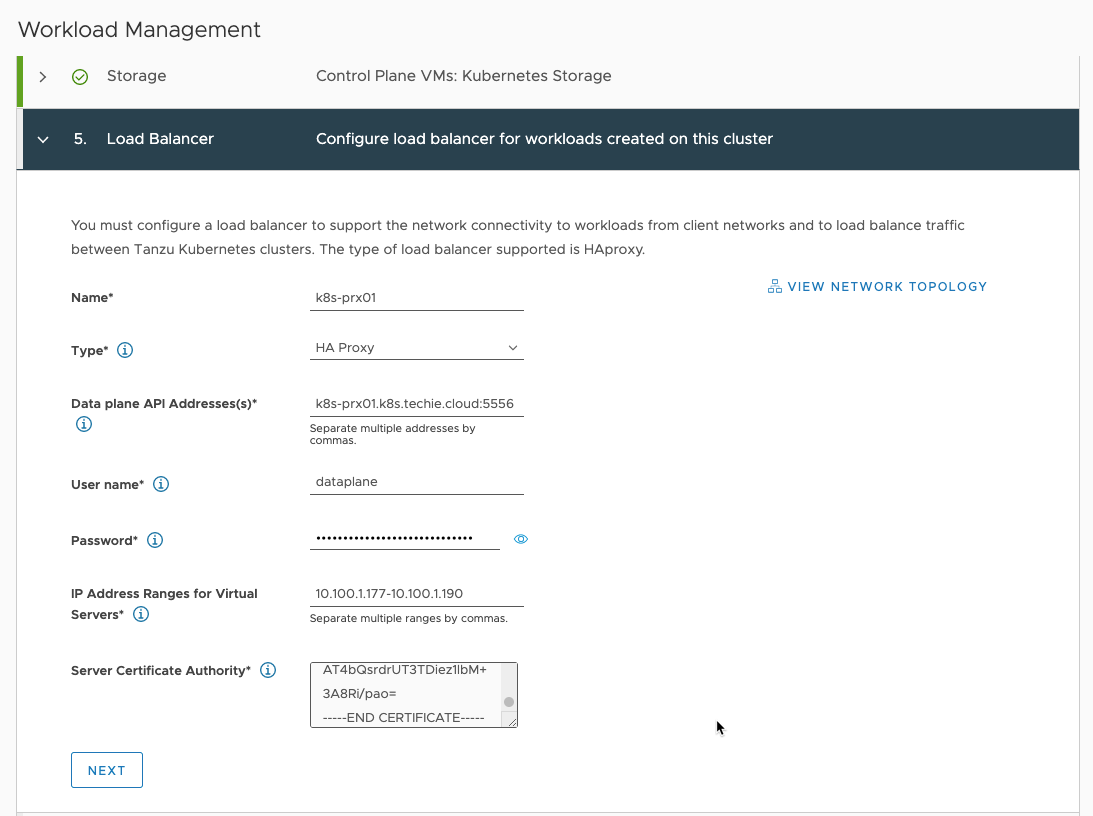
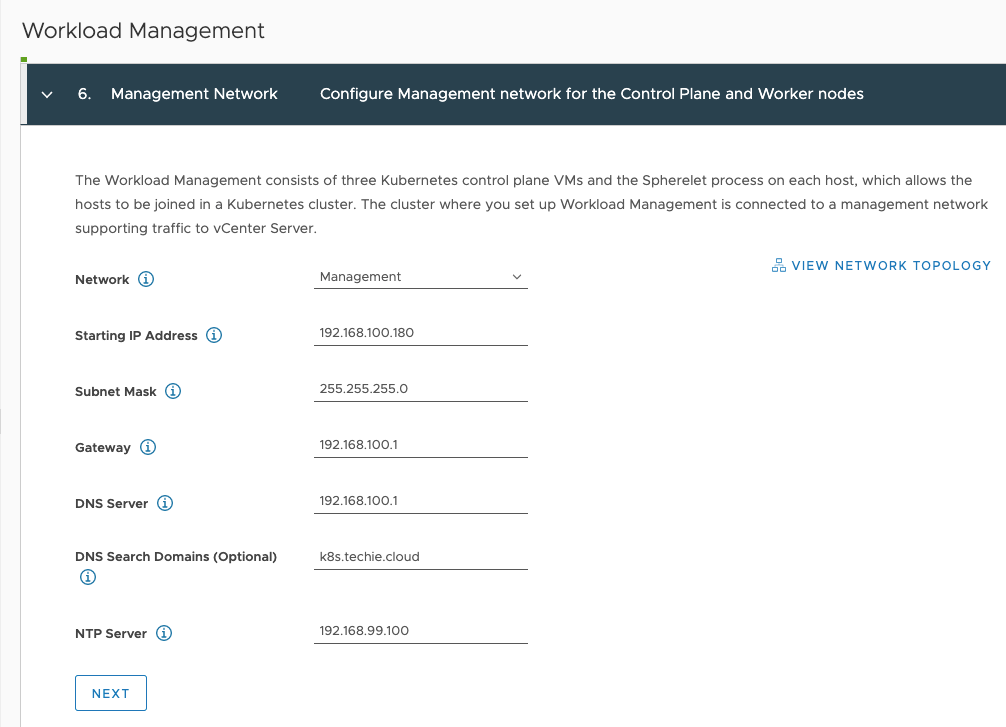
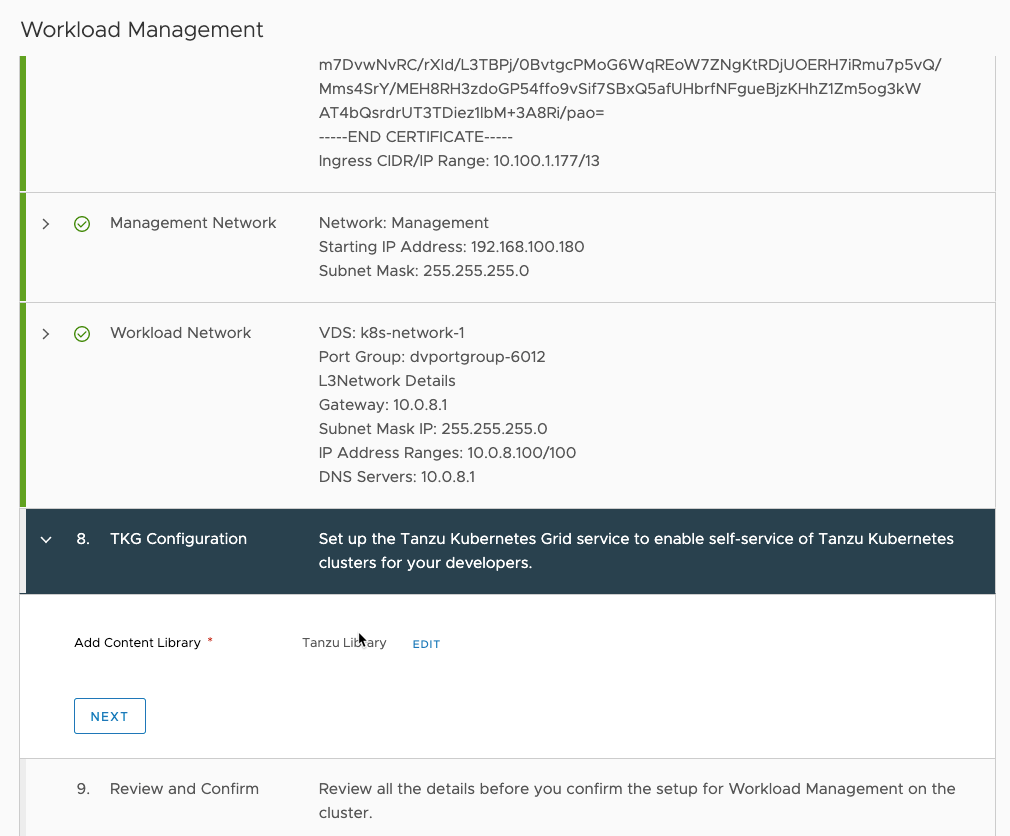
Then enter the information about your management network. “Starting IP Address” is the first of 5 IP addresses in a row that will be used.
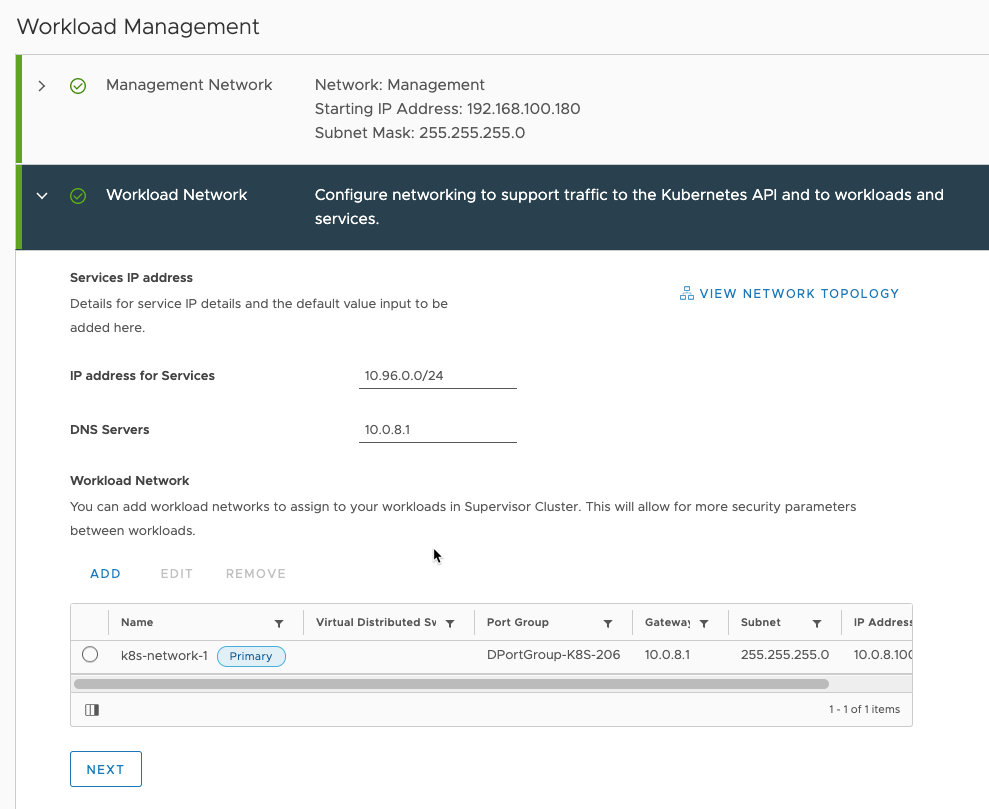
Then enter the general information about your workload network. Also click the add button to add a workload network.
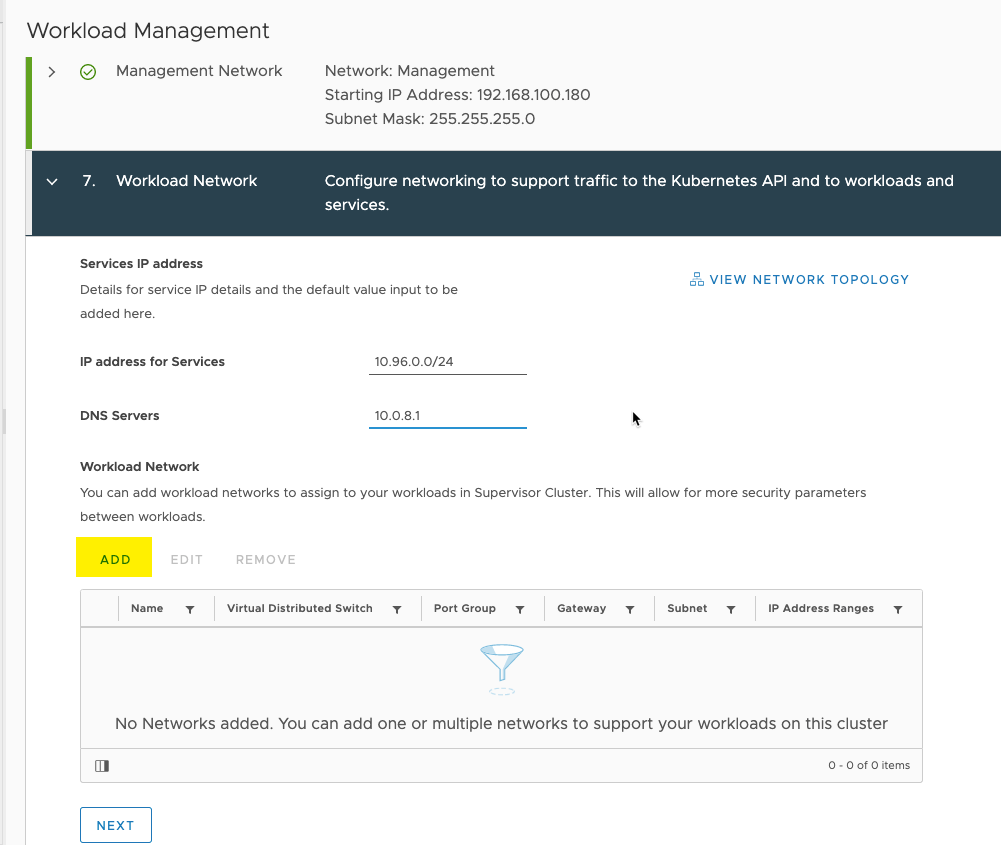
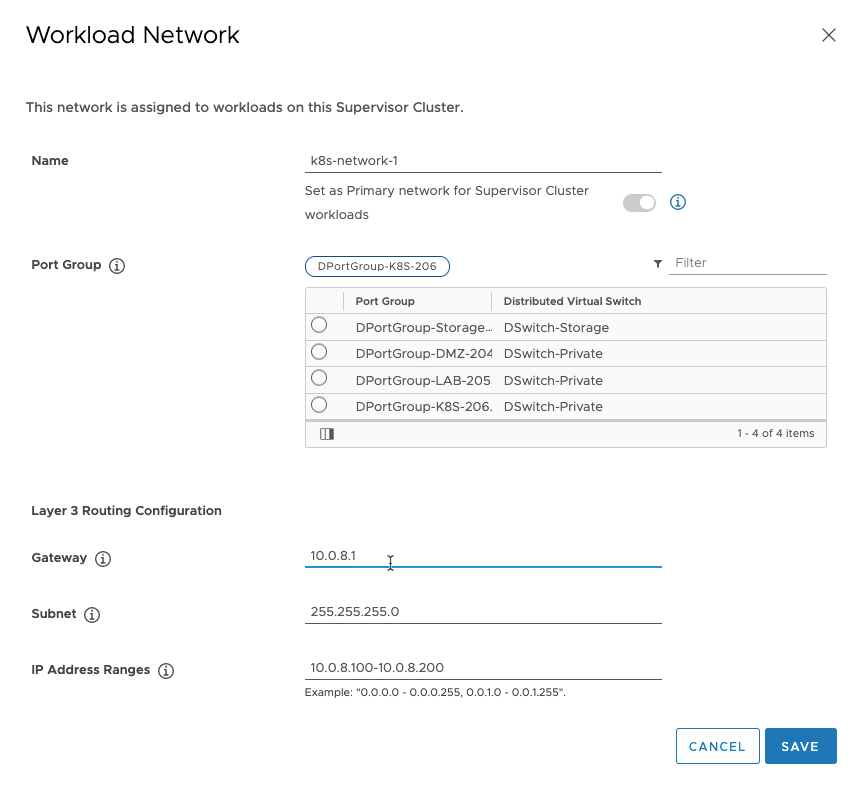
Name the netowkr you’re adding, and choose the “Port Group”, and add the rest of the information needed, then save.
Now you need to add the content library you previously created.
Everything should now be ready for deployment.
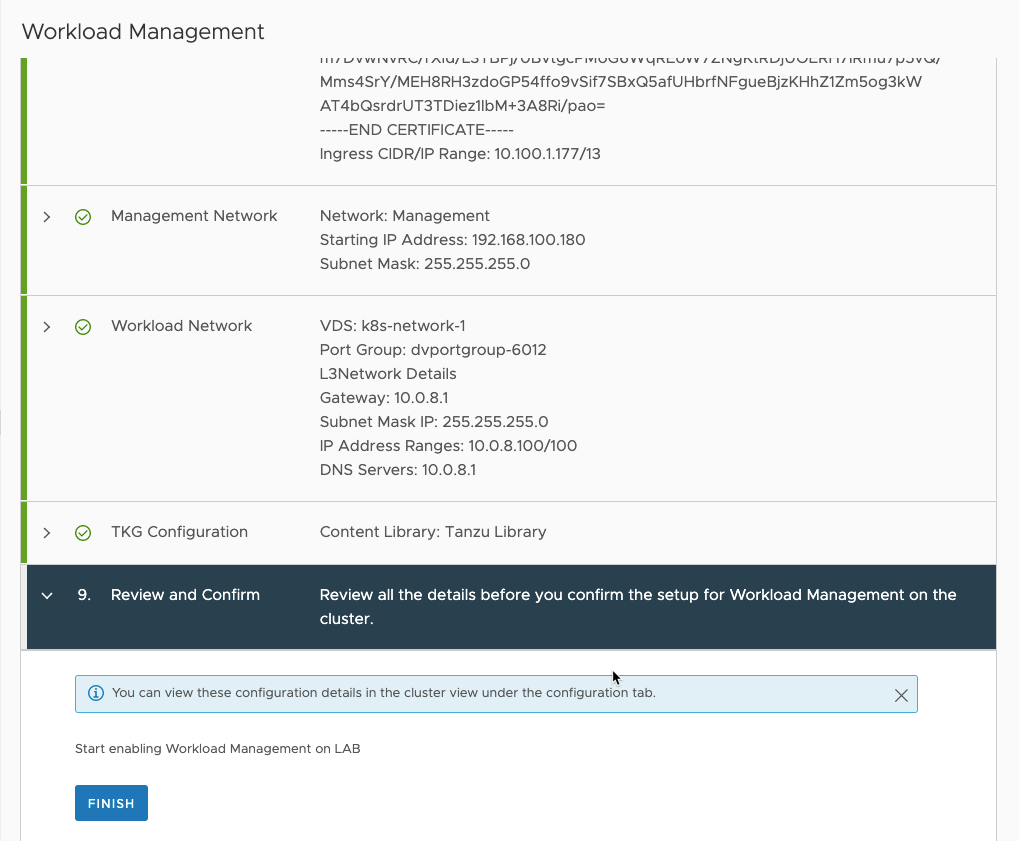
Then you can finish the wizard.
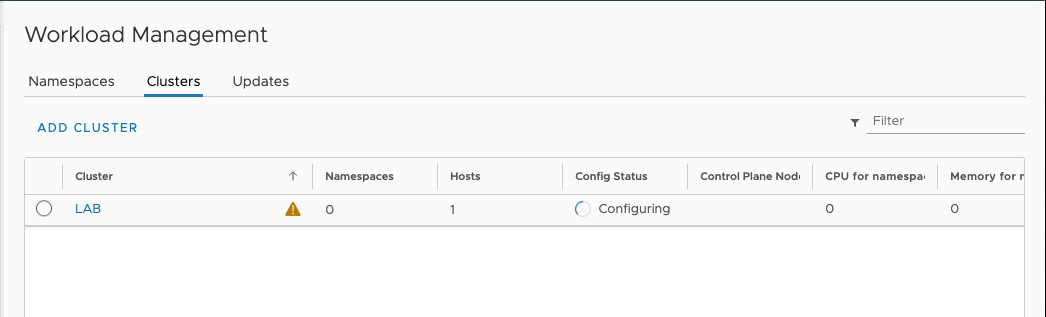
This might take a while.
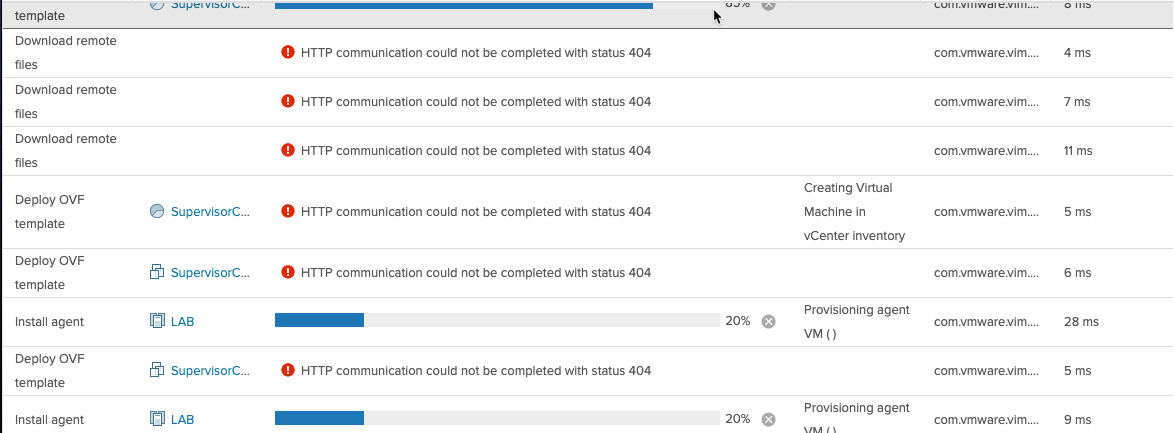
You might get 404 error, but those can be ignored. Seems to be a known issue. More info around this issue here.
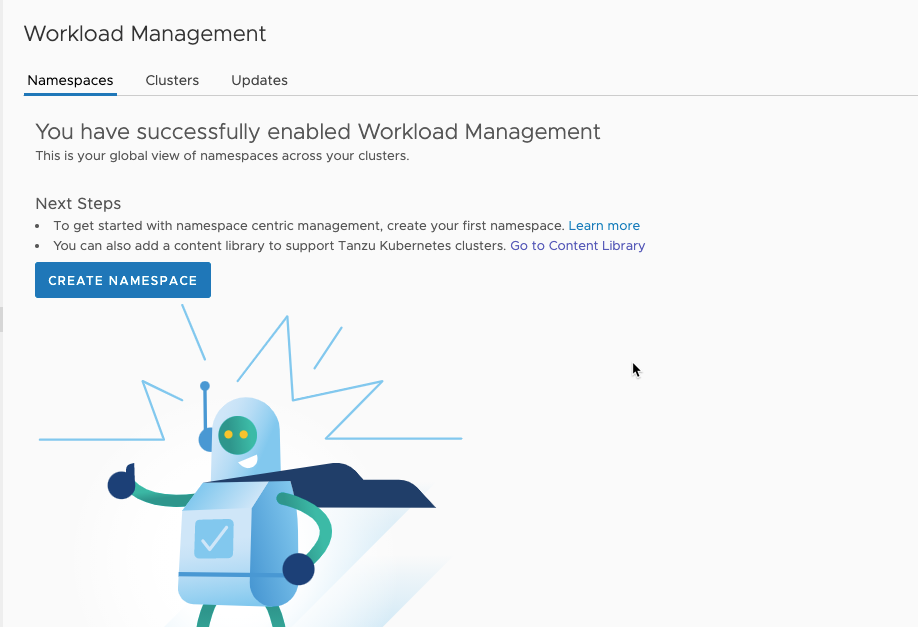
After the “Workload Management” cluster has been deployed, it should look like this.

Creating namespace
Now it’s ready for creating namespaces. Click the button “CREATE NAMESPACE”.
Choose the cluster it should be on, name it, and also choose the workload network that it will use. Add an description if needed.
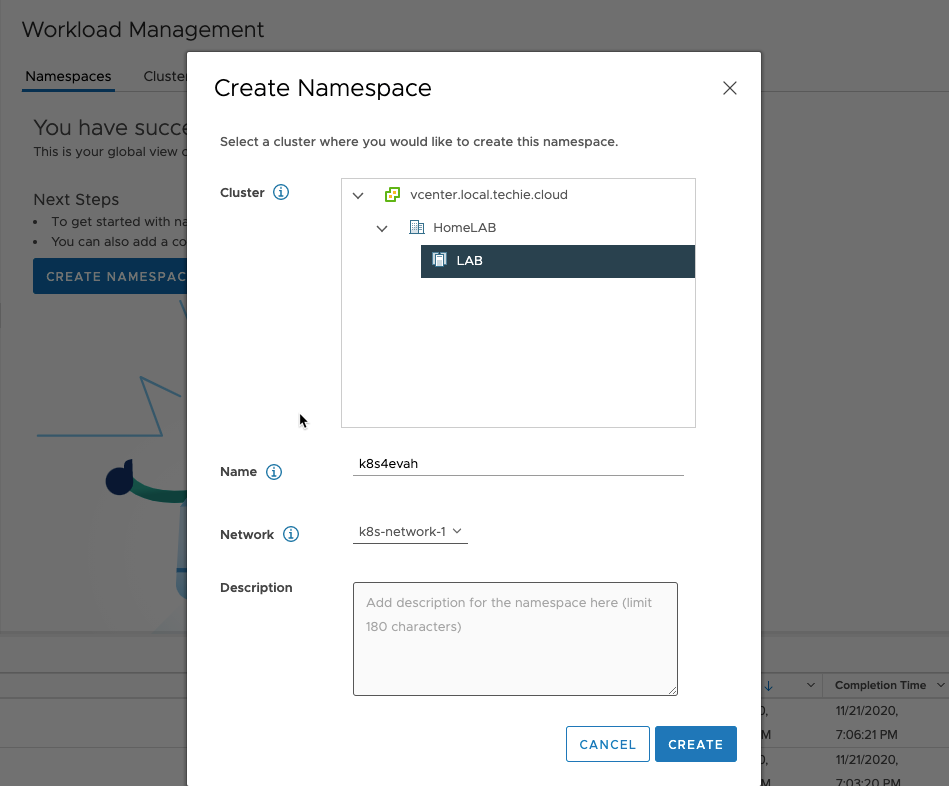
After a little wile it is created.
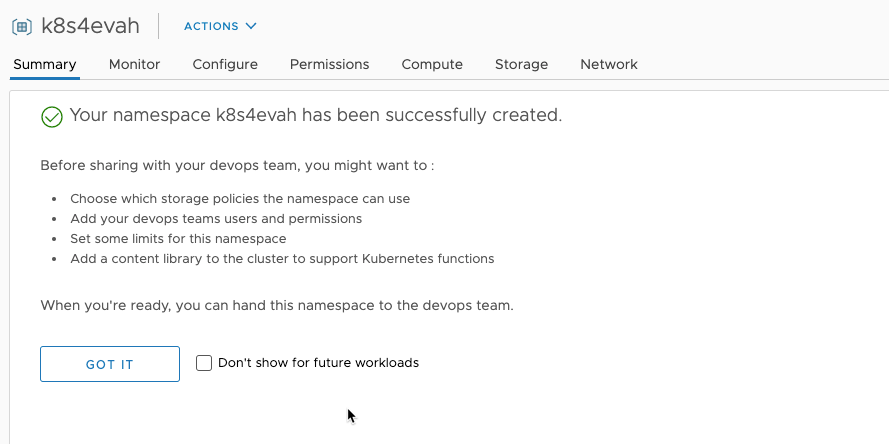
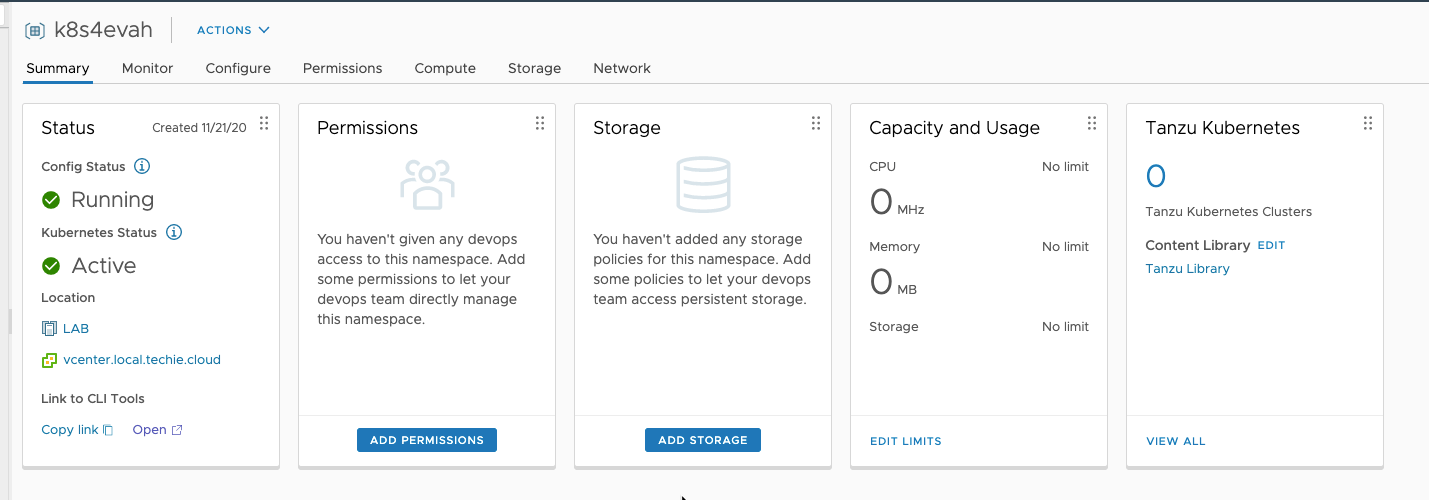
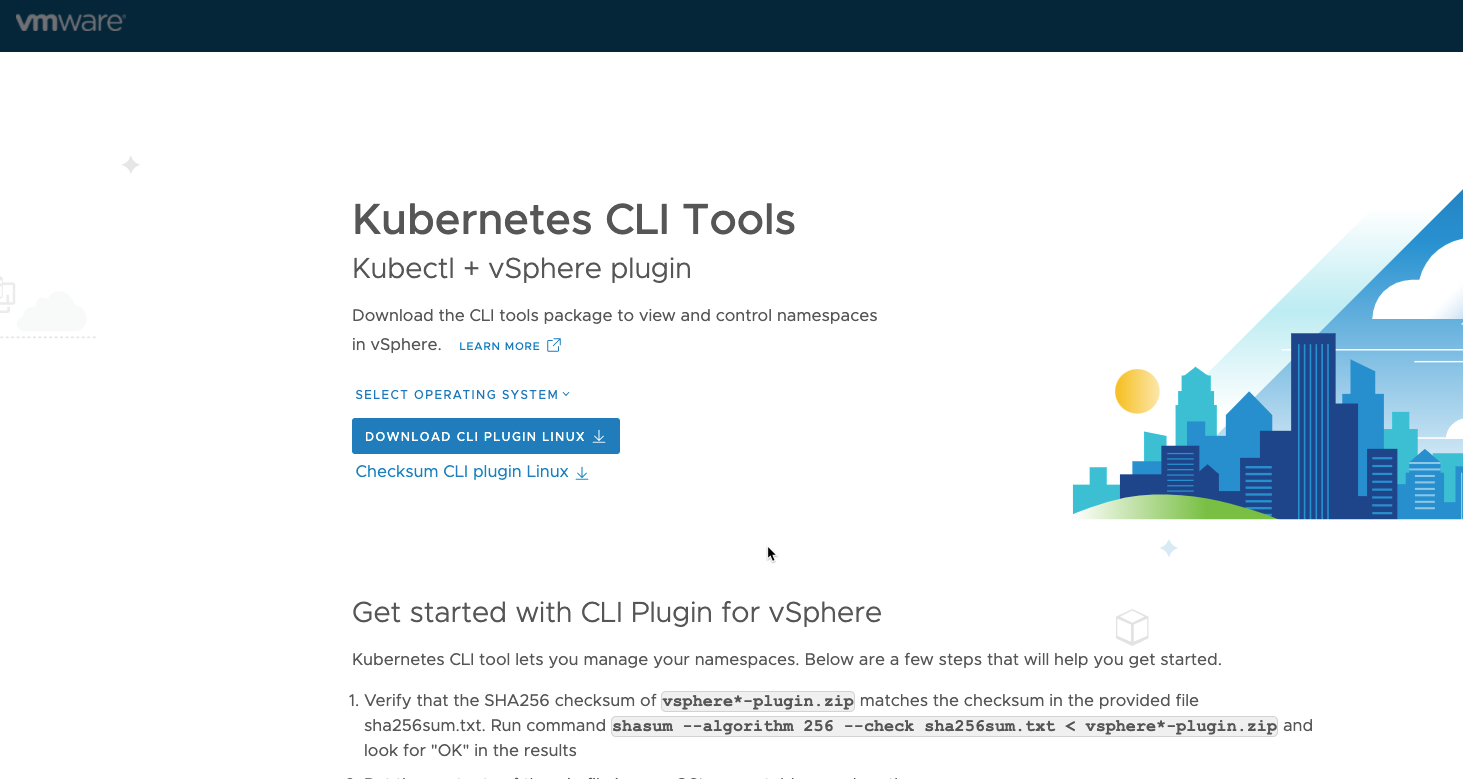
It should now look similar to this, and you can click “Open” to open a webpage on your Supervisor Controllers.
This gives you a small guide on how to get started, and provides you with the CLI plugin binaries that you need to operate this kubernetes cluster. Download, unzip, and place in /usr/local/bin for easy access and use if your are on linux.
After this you can also add a storage policy to the namespace. Here I use the same policy for the NFS storage as I used in the deployment.
Everything is now ready for use. For the steps further I’d go check out the vSphere with Tanzu Quick Start Demo.
References
- (1): https://techie.cloud/vmwaretanzu/ “VMware Tanzu - What is it, and why should I use it”
- (2): https://frankdenneman.nl/2020/11/06/vsphere-with-tanzu-vcenter-server-network-configuration-overview/ “VSPHERE WITH TANZU VCENTER SERVER NETWORK CONFIGURATION OVERVIEW”
- (3): https://cdn.haproxy.com/download/haproxy/vsphere/ova/vmware-haproxy-v0.1.8.ova “HAproxy OVA appliance”
- (4): https://github.com/haproxytech/vmware-haproxy “VMware + HAProxy”
- (5): https://techie.cloud/blog/2020/11/26/issues-encountered-when-setting-up-vmware-tanzu/ “Issues encountered when setting up VMware Tanzu”
- (6): https://github.com/hashicorp/terraform-provider-vsphere/pull/1241 “Support for no disks in config #1241”
- (7): https://github.com/hashicorp/terraform-provider-vsphere/pull/1215 “add deployment ovf option #1215”
- (8): https://www.virtuallyghetto.com/2020/11/quick-tip-rebooting-vcsa-causes-vsphere-with-tanzu-to-show-esxi-hosts-not-licensed-for-workload-management.html “Quick Tip – Rebooting VCSA causes vSphere with Tanzu to show ESXi hosts not licensed for Workload Management”
- (9): https://www.virtuallyghetto.com/2020/11/why-am-i-seeing-http-communication-status-404-error-when-configuring-vsphere-with-tanzu-how-to-fix.html “Why am I seeing HTTP communication status 404 error when configuring vSphere with Tanzu & how to fix?”
- (10): https://github.com/vsphere-tmm/vsphere-with-tanzu-quick-start “vSphere with Tanzu Quick Start Demo”