Free SSL cert from Let's Encrypt or Buypass on VMware VCSA
Jan 1, 2019 · CommentsVMware
Warning
For me this is a setup in a non-production home lab environment, and not something I’d recommend doing in a production environment. There is no added security by the certificate in doing this, as the VCSA should already be in a internal management trusted sone.
Pre-requisites
- Preinstalled VMware vCenter Server Appliance (VCSA).
- A bastion host for running certbot which has ssh access to VCSA.
Setting up the VCSA to trust Let’s Encrypt or Buypass root certificate
I’m adding the root CA manually as this will be a one time process, and will not need to be done later on. For this you will need to login to your VCSA.
Open the vSpehre Client (HTML5).
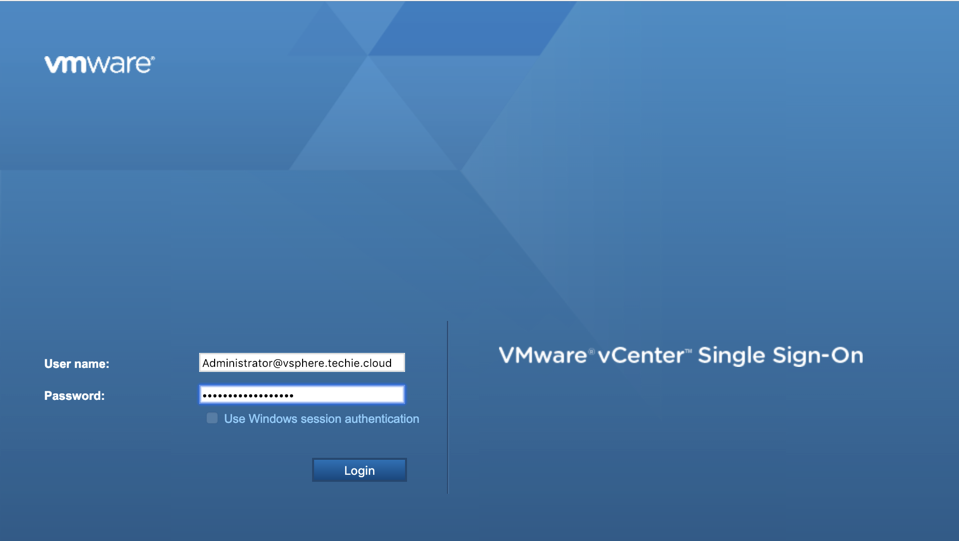
Login with you administrative account.
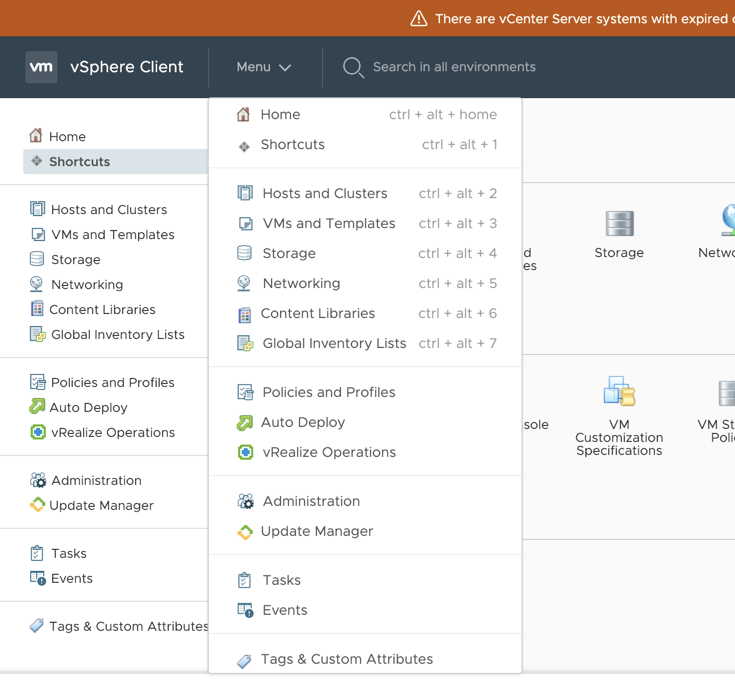
When you’re logged in, go to “Menu” -> “Administration”.
Then go to “Certificates” -> “Certificate Mangement”.
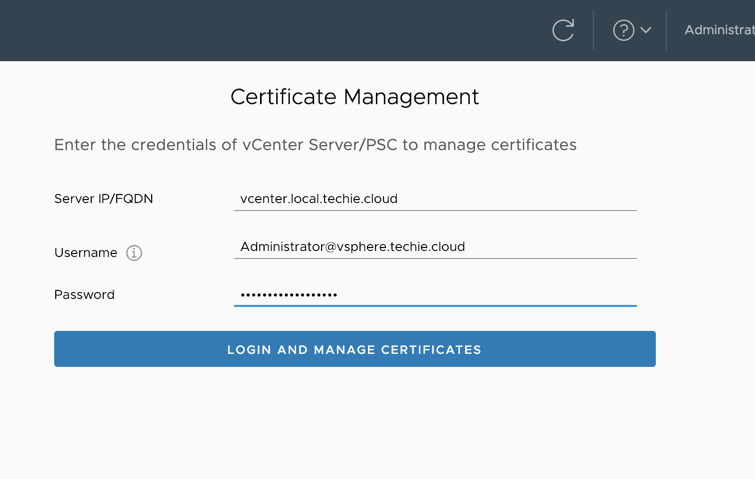
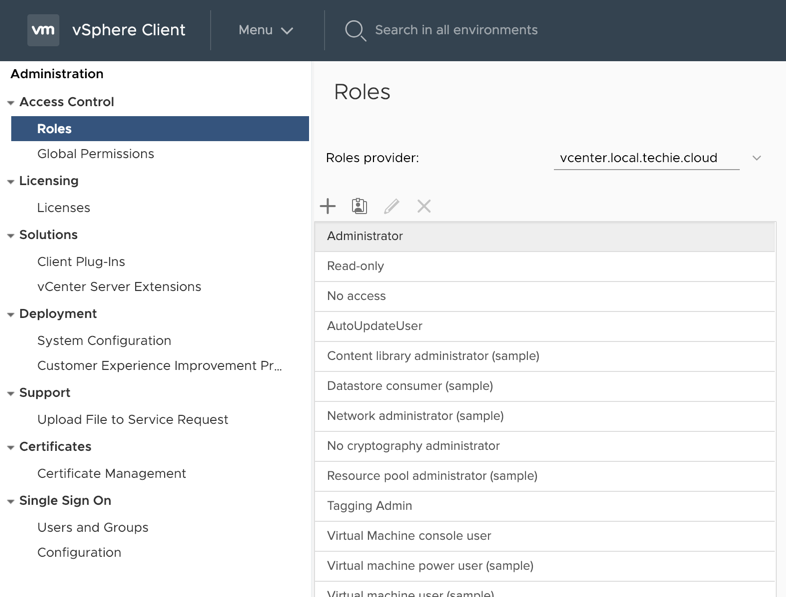
Then you need to login again with the FQDN for the server, and administrative user, and password.
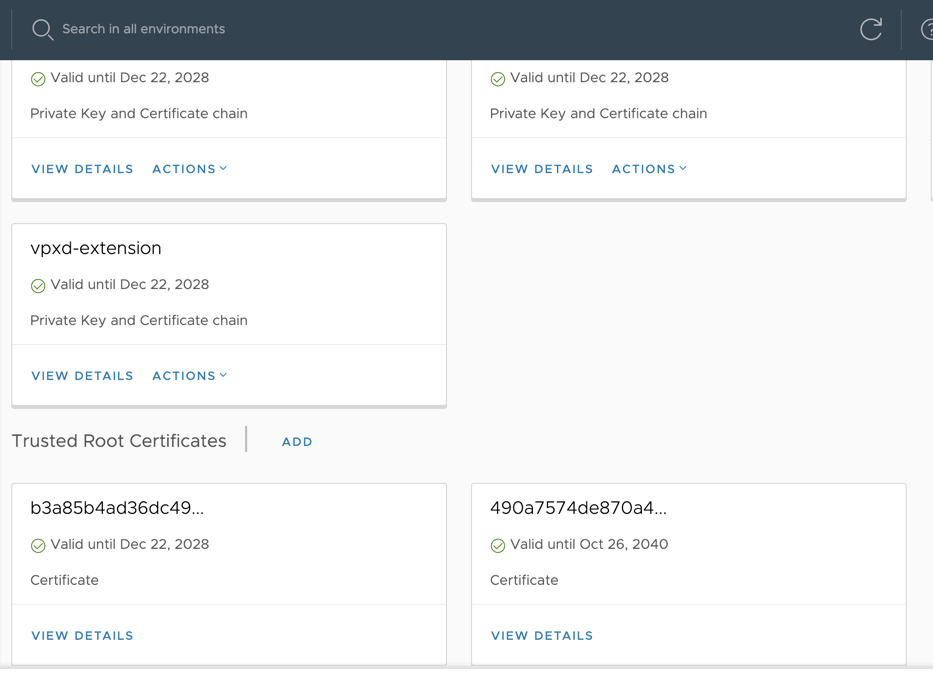
When you’ve logged in, you’ll find the section called “Trusted Root Certificates”. You’ll need to press “Add” here.

You’ll then have to browse to the correct root CA to add.
Let’s Encrypt root CA
The Let’s Encrypt most used root CA is called “TrustID X3” and is from IdenTrust and can be downloaded here.
Or if you trust this site the content of the root CA file is below.
-----BEGIN CERTIFICATE-----
MIIDSjCCAjKgAwIBAgIQRK+wgNajJ7qJMDmGLvhAazANBgkqhkiG9w0BAQUFADA/
MSQwIgYDVQQKExtEaWdpdGFsIFNpZ25hdHVyZSBUcnVzdCBDby4xFzAVBgNVBAMT
DkRTVCBSb290IENBIFgzMB4XDTAwMDkzMDIxMTIxOVoXDTIxMDkzMDE0MDExNVow
PzEkMCIGA1UEChMbRGlnaXRhbCBTaWduYXR1cmUgVHJ1c3QgQ28uMRcwFQYDVQQD
Ew5EU1QgUm9vdCBDQSBYMzCCASIwDQYJKoZIhvcNAQEBBQADggEPADCCAQoCggEB
AN+v6ZdQCINXtMxiZfaQguzH0yxrMMpb7NnDfcdAwRgUi+DoM3ZJKuM/IUmTrE4O
rz5Iy2Xu/NMhD2XSKtkyj4zl93ewEnu1lcCJo6m67XMuegwGMoOifooUMM0RoOEq
OLl5CjH9UL2AZd+3UWODyOKIYepLYYHsUmu5ouJLGiifSKOeDNoJjj4XLh7dIN9b
xiqKqy69cK3FCxolkHRyxXtqqzTWMIn/5WgTe1QLyNau7Fqckh49ZLOMxt+/yUFw
7BZy1SbsOFU5Q9D8/RhcQPGX69Wam40dutolucbY38EVAjqr2m7xPi71XAicPNaD
aeQQmxkqtilX4+U9m5/wAl0CAwEAAaNCMEAwDwYDVR0TAQH/BAUwAwEB/zAOBgNV
HQ8BAf8EBAMCAQYwHQYDVR0OBBYEFMSnsaR7LHH62+FLkHX/xBVghYkQMA0GCSqG
SIb3DQEBBQUAA4IBAQCjGiybFwBcqR7uKGY3Or+Dxz9LwwmglSBd49lZRNI+DT69
ikugdB/OEIKcdBodfpga3csTS7MgROSR6cz8faXbauX+5v3gTt23ADq1cEmv8uXr
AvHRAosZy5Q6XkjEGB5YGV8eAlrwDPGxrancWYaLbumR9YbK+rlmM6pZW87ipxZz
R8srzJmwN0jP41ZL9c8PDHIyh8bwRLtTcm1D9SZImlJnt1ir/md2cXjbDaJWFBM5
JDGFoqgCWjBH4d1QB7wCCZAA62RjYJsWvIjJEubSfZGL+T0yjWW06XyxV3bqxbYo
Ob8VZRzI9neWagqNdwvYkQsEjgfbKbYK7p2CNTUQ
-----END CERTIFICATE-----
Buypass GO root CA
Buypass uses it’s own root CA and can be downloaded here.
Or if you trust this site the content of the root CA file is below.
-----BEGIN CERTIFICATE-----
MIIFWTCCA0GgAwIBAgIBAjANBgkqhkiG9w0BAQsFADBOMQswCQYDVQQGEwJOTzEd
MBsGA1UECgwUQnV5cGFzcyBBUy05ODMxNjMzMjcxIDAeBgNVBAMMF0J1eXBhc3Mg
Q2xhc3MgMiBSb290IENBMB4XDTEwMTAyNjA4MzgwM1oXDTQwMTAyNjA4MzgwM1ow
TjELMAkGA1UEBhMCTk8xHTAbBgNVBAoMFEJ1eXBhc3MgQVMtOTgzMTYzMzI3MSAw
HgYDVQQDDBdCdXlwYXNzIENsYXNzIDIgUm9vdCBDQTCCAiIwDQYJKoZIhvcNAQEB
BQADggIPADCCAgoCggIBANfHXvfBB9R3+0Mh9PT1aeTuMgHbo4Yf5FkNuud1g1Lr
6hxhFUi7HQfKjK6w3Jad6sNgkoaCKHOcVgb/S2TwDCo3SbXlzwx87vFKu3MwZfPV
L4O2fuPn9Z6rYPnT8Z2SdIrkHJasW4DptfQxh6NR/Md+oW+OU3fUl8FVM5I+GC91
1K2GScuVr1QGbNgGE41b/+EmGVnAJLqBcXmQRFBoJJRfuLMR8SlBYaNByyM21cHx
MlAQTn/0hpPshNOOvEu/XAFOBz3cFIqUCqTqc/sLUegTBxj6DvEr0VQVfTzh97QZ
QmdiXnfgolXsttlpF9U6r0TtSsWe5HonfOV116rLJeffawrbD02TTqigzXsu8lkB
arcNuAeBfos4GzjmCleZPe4h6KP1DBbdi+w0jpwqHAAVF41og9JwnxgIzRFo1clr
Us3ERo/ctfPYV3Me6ZQ5BL/T3jjetFPsaRyifsSP5BtwrfKi+fv3FmRmaZ9JUaLi
FRhnBkp/1Wy1TbMz4GHrXb7pmA8y1x1LPC5aAVKRCfLf6o3YBkBjqhHk/sM3nhRS
P/TizPJhk9H9Z2vXUq6/aKtAQ6BXNVN48FP4YUIHZMbXb5tMOA1jrGKvNouicwoN
9SG9dKpN6nIDSdvHXx1iY8f93ZHsM+71bbRuMGjeyNYmsHVee7QHIJihdjK4TWxP
AgMBAAGjQjBAMA8GA1UdEwEB/wQFMAMBAf8wHQYDVR0OBBYEFMmAd+BikoL1Rpzz
uvdMw964o605MA4GA1UdDwEB/wQEAwIBBjANBgkqhkiG9w0BAQsFAAOCAgEAU18h
9bqwOlI5LJKwbADJ784g7wbylp7ppHR/ehb8t/W2+xUbP6umwHJdELFx7rxP462s
A20ucS6vxOOto70MEae0/0qyexAQH6dXQbLArvQsWdZHEIjzIVEpMMpghq9Gqx3t
OluwlN5E40EIosHsHdb9T7bWR9AUC8rmyrV7d35BH16Dx7aMOZawP5aBQW9gkOLo
+fsicdl9sz1Gv7SEr5AcD48Saq/v7h56rgJKihcrdv6sVIkkLE8/trKnToyokZf7
KcZ7XC25y2a2t6hbElGFtQl+Ynhw/qlqYLYdDnkM/crqJIByw5c/8nerQyIKx+u2
DISCLIBrQYoIwOula9+ZEsuK1V6ADJHgJgg2SMX6OBE1/yWDLfJ6v9r9jv6ly0Us
H8SIU653DtmadsWOLB2jutXsMq7Aqqz30XpN69QH4kj3Io6wpJ9qzo6ysmD0oyLQ
I+uUWnpp3Q+/QFesa1lQ2aOZ4W7+jQF5JyMV3pKdewlNWudLSDBaGOYKbeaP4NK7
5t98biGCwWg5TbSYWGZizEqQXsP6JwSxeRV0mcy+rSDeJmAc61ZRpqPq5KM/p/9h
3PFaTWwyI0PurKju7koSCTxdccK+efrCh2gdC/1cacwG0Jp9VJkqyTkaGa9LKkPz
Y11aWOIv4x3kqdbQCtCev9eBCfHJxyYNrJgWVqA=
-----END CERTIFICATE-----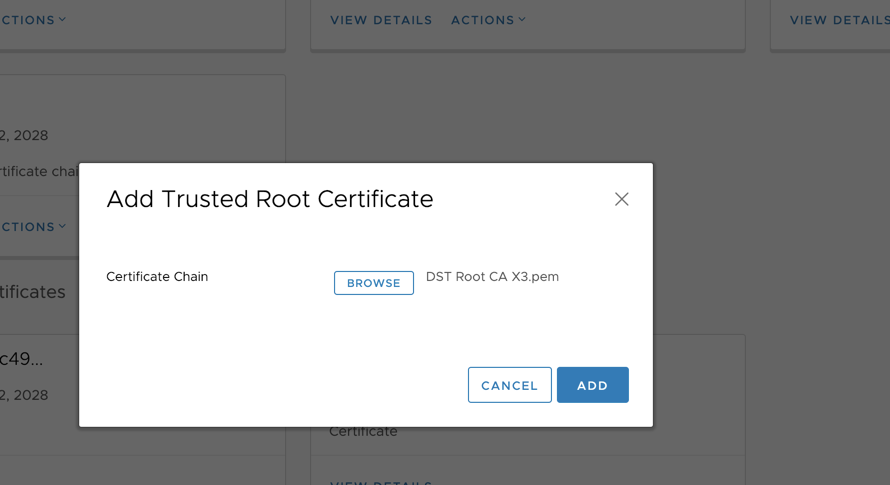
When you’ve chosen the correct file, then click ‘Add’. You’ve now successfully added a new root CA as trusted to your VCSA.
Setting up certbot
First you’ll need to install certbot on your bastion host if you do not have it installed already.
yum install certbotNow, since I also use Cloudflare, I use the DNS plugin for that for validation.
yum install python2-certbot-dns-cloudflareTweaking SSH access to VCSA
Now we’ll also need to do some changes to VCSA to allow SSH access, and you also need a public key for passowrdless authentication. On your bastion either copy your public key, or create one if you have none.
ssh-keygen -t rsaJust press enter on the passphrase so it will be empty. Then copy the content from “~/.ssh/id_rsa.pub”. Then login to the VCSA by running SSH from your bastion host.
ssh root@vcenter.local.techie.cloudWhen you login the first time, you’ll get into the VCSA cli, here you need to type the command “shell” to get to a normal shell.
shellNow swith the root users shell to “bash”. This is also mentioned in KB#2100508.
chsh -s /bin/bash rootThen you’ll need to paste the content of your id_rsa.pub into “~/.ssh/authorized_keys”. And afterwards you can exit. Now test the passwordless login from your bastion host to see that it is working as expected.
Running certbot
Now we need to set up the connection between certbot and vcenter for the automation. I’ve set up this script as “/etc/letsencrypt/renewal-hooks/post/renew-vcenter.sh”, which will run as an deploy hook in certbot.
#!/usr/bin/bash
VCENTER_HOST="vcenter.local.techie.cloud"
VCENTER_ADMIN_USER="root"
VCENTER_CERT_LOCATION="/tmp"
CERTLOCATION="${RENEWED_LINEAGE}"
CERTNAME="${RENEWED_DOMAINS}"

scp "${CERTLOCATION}/fullchain.pem" "${CERTLOCATION}/privkey.pem" ${VCENTER_ADMIN_USER}@${VCENTER_HOST}:${VCENTER_CERT_LOCATION}
ssh ${VCENTER_ADMIN_USER}@${VCENTER_HOST} "service-control --stop --all;service-control --start vmafdd vmdird vmcad;/usr/lib/vmware-vmafd/bin/vecs-cli entry delete --store MACHINE_SSL_CERT --alias __MACHINE_CERT -y;/usr/lib/vmware-vmafd/bin/vecs-cli entry create --store MACHINE_SSL_CERT --alias __MACHINE_CERT --cert /tmp/fullchain.pem --key /tmp/privkey.pem;service-control --stop --all;service-control --start --all"
Remeber to make the script executable.
chmod 755 /etc/letsencrypt/renewal-hooks/post/renew-vcenter.shNow it’s time to run the certbot command for issuing the certificate.
Let’s Encrypt command
certbot certonly --dns-cloudflare --dns-cloudflare-credentials ~/.secrets/certbot/cloudflare.ini -d vcenter.local.techie.cloud --email example@techie.cloud --deploy-hook /etc/letsencrypt/renewal-hooks/post/renew-vcenter.shBuypass GO command
certbot certonly --dns-cloudflare --dns-cloudflare-credentials ~/.secrets/certbot/cloudflare.ini --server https://api.buypass.com/acme/directory --email example@techie.cloud -d vcenter.local.techie.cloud --deploy-hook /etc/letsencrypt/renewal-hooks/post/renew-vcenter.shAnd then you set up the normal cron job for renewing certbot and everything should now be fine and you’ll have an trusted official certificate on the VCSA web GUI.